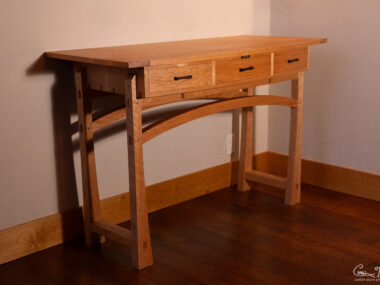
Curved Entry Way Table – Modern Woodworking
I’ve been wanting to build more furniture for our house, and I’ve long been inspired by seeing Michael Peckovich’s work, especially his Curved Entry Way Table that I saw in his book Foundations of Woodworking. His book is chocked full of great information, and I feel like I’ve learned more things from his book than from any other basic woodworking book, and believe me, I’ve got a ton of them! A lot of books tend to provide too much generic information, with 50 ways to skin a cat, and not enough specifics on exactly how to do things in the best way.
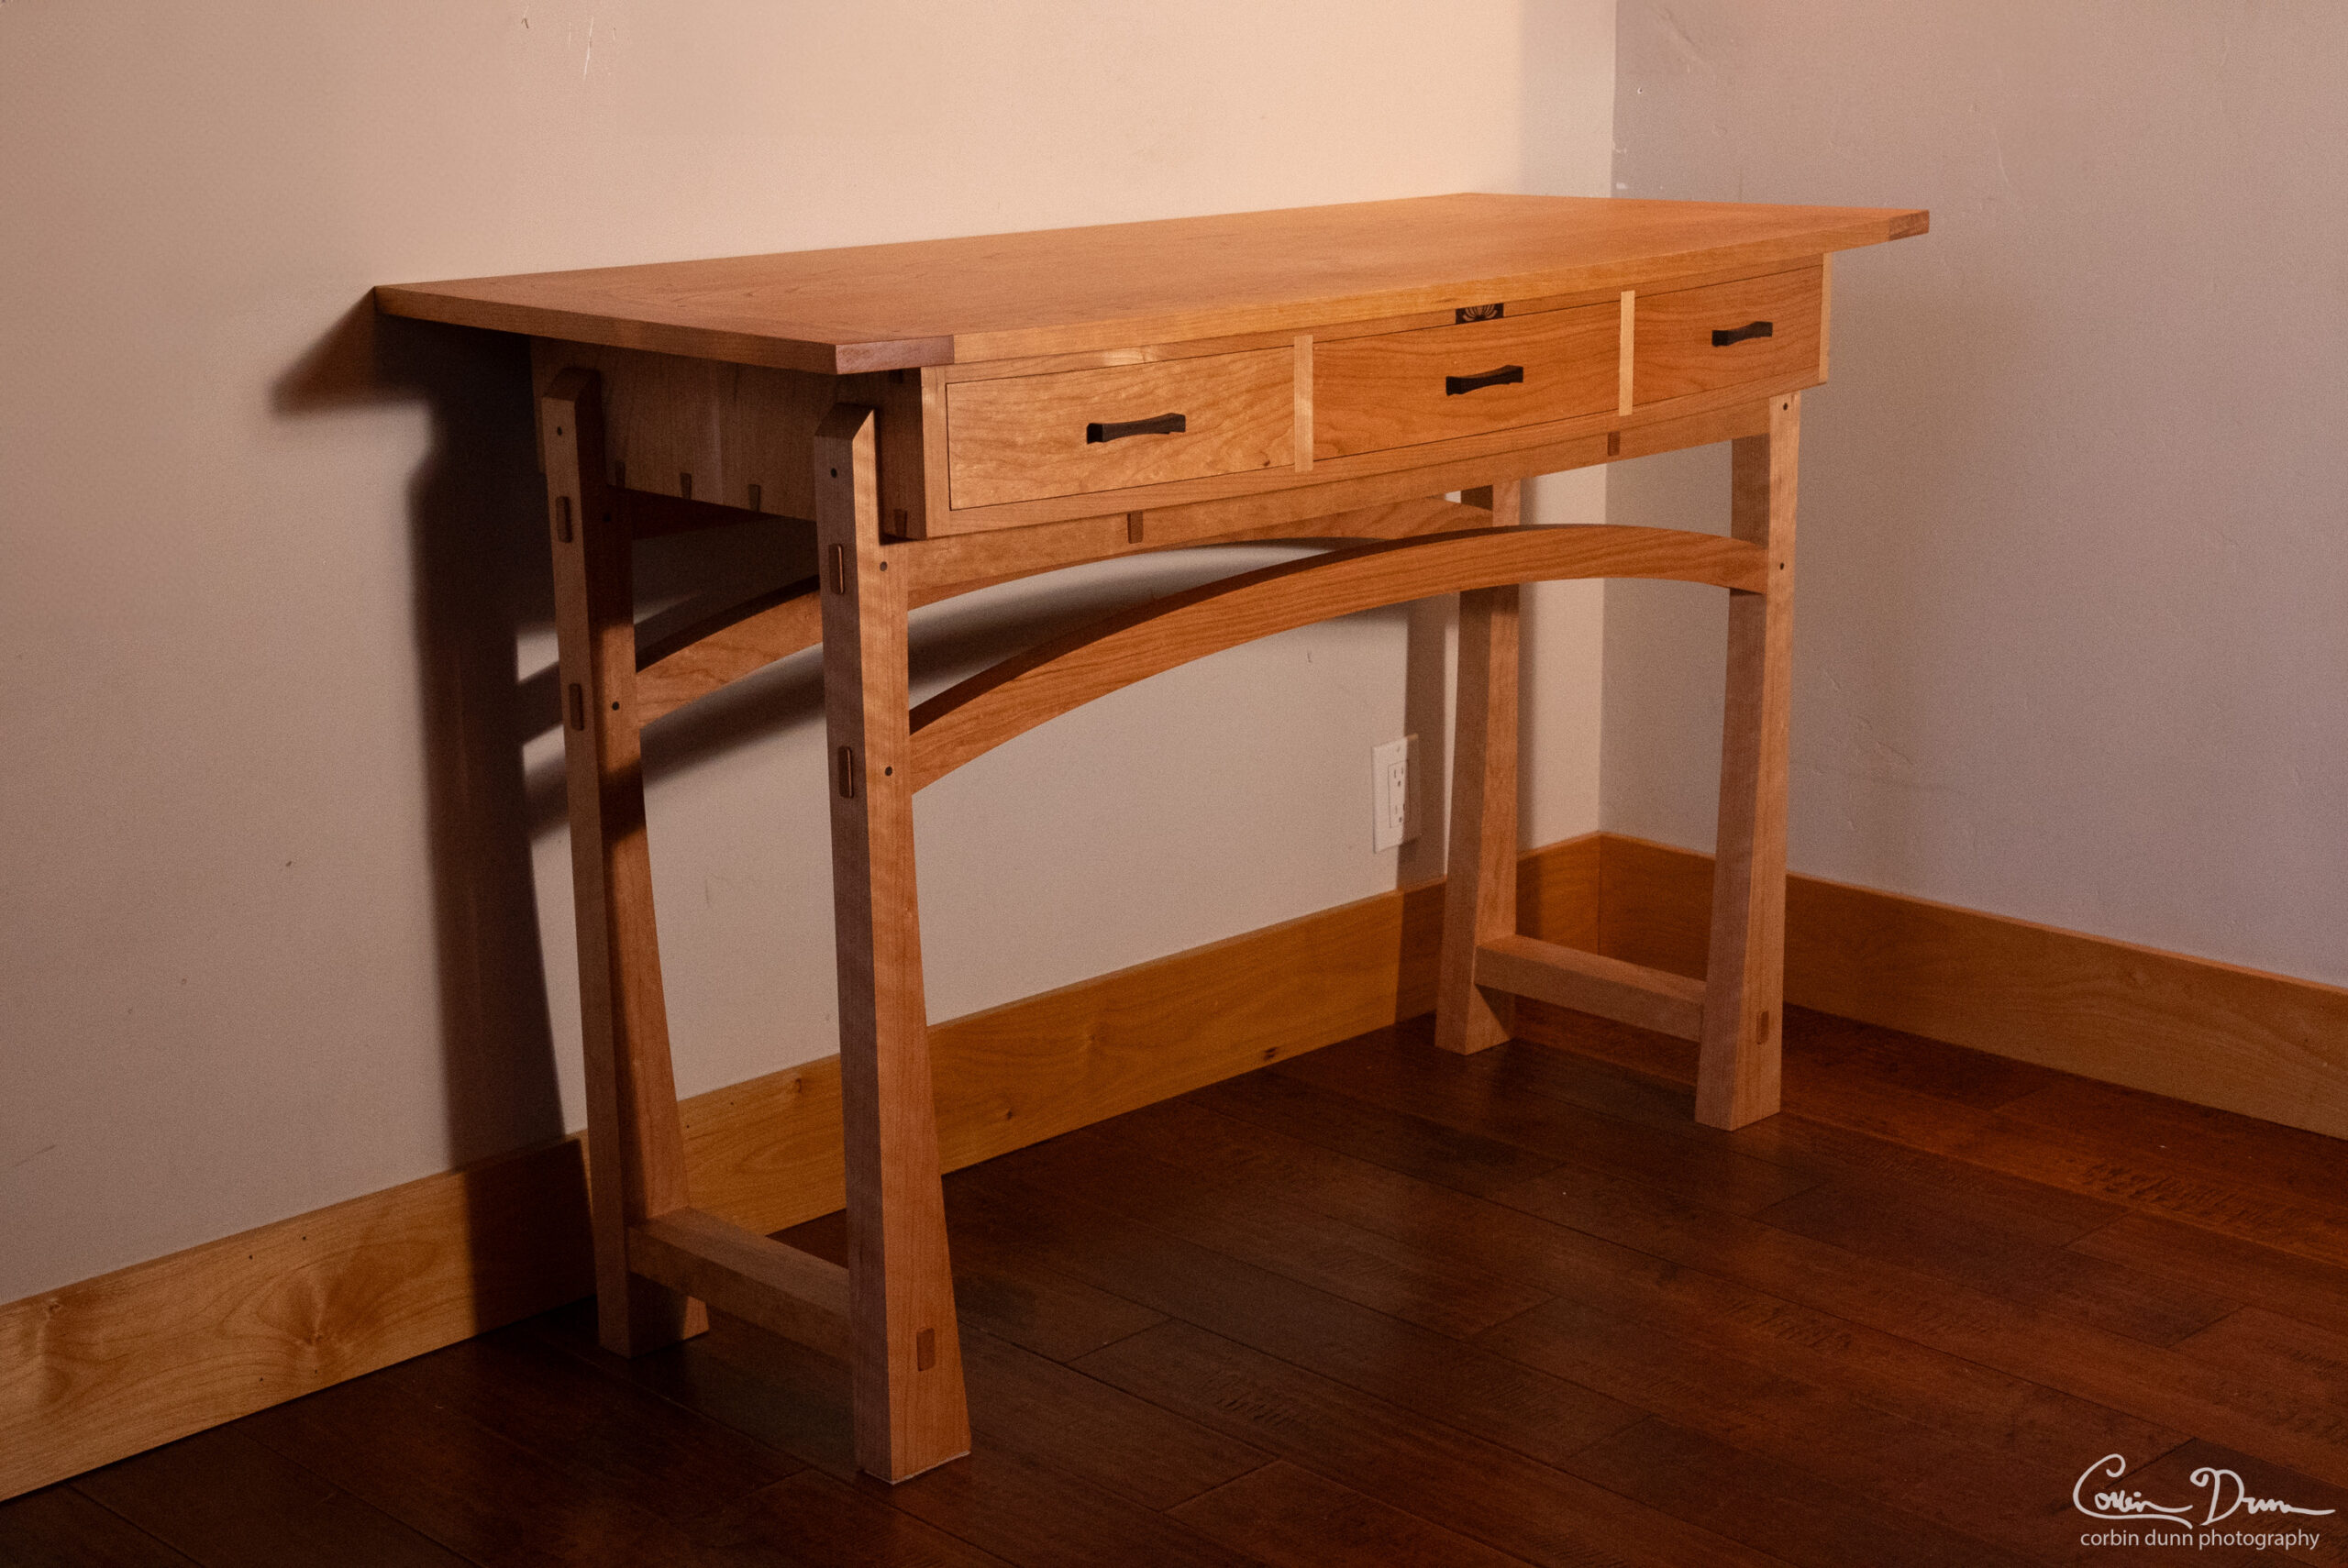
I definitely admired his open joinery and the curved arches in the table he designed, but I wanted to make it even more curvy, simply because curves are easy to cut on a CNC machine and I feel like the only reason people stay away from them is that they are hard to cut with traditional woodworking machinery. I resized the table to fit a particular location in our house, making it a bit longer and deeper than his design. This basically brought it into ‘desk’ size, and it could almost double as a desk if it wasn’t for the bottom arches getting in the way of your legs.

I curved the legs, which meant all the through mortise and tenon joinery would also have to be curved at the entry point, which isn’t a problem when doing modern CNC woodworking, but it did take some time to figure out the optimal toolpaths in Autodesk Fusion. Like Michael, I pegged all the joints, but I used walnut to make it stand out against cherry, which is my primary wood of choice for furniture. Michael’s table used oak, which looks fabulous! I generally don’t like oak, as it brings me back to the 1980’s furniture where oak was everywhere with the over-stained grain standing out like a sore thumb. But I really want to take a more modern look at oak, as the grain and flecking patterns from some California black oak can be off the hook. I’m slowly acquiring a collection of oak slabs from some storm dead trees that I chainsaw milled, and maybe someday we’ll see something from my wood hoard.
So the legs are curved, and I also added a long curve to the top of the table, which is matched by the curved drawer fronts that are half-blind dovetailed into the drawers. I knew this would be one of the most challenging parts of the build, but a lot of great woodworking has intricate curves that seem incredibly difficult to make. I was hoping that the CNC would add a level of precision to make it all work, and in some ways it did, but in other ways it still involved a lot of hand tools to get it to fit right. I talk a bit about this in the video, and while I emphasize modern being CNC, I also increased my hand plane skills with this project.
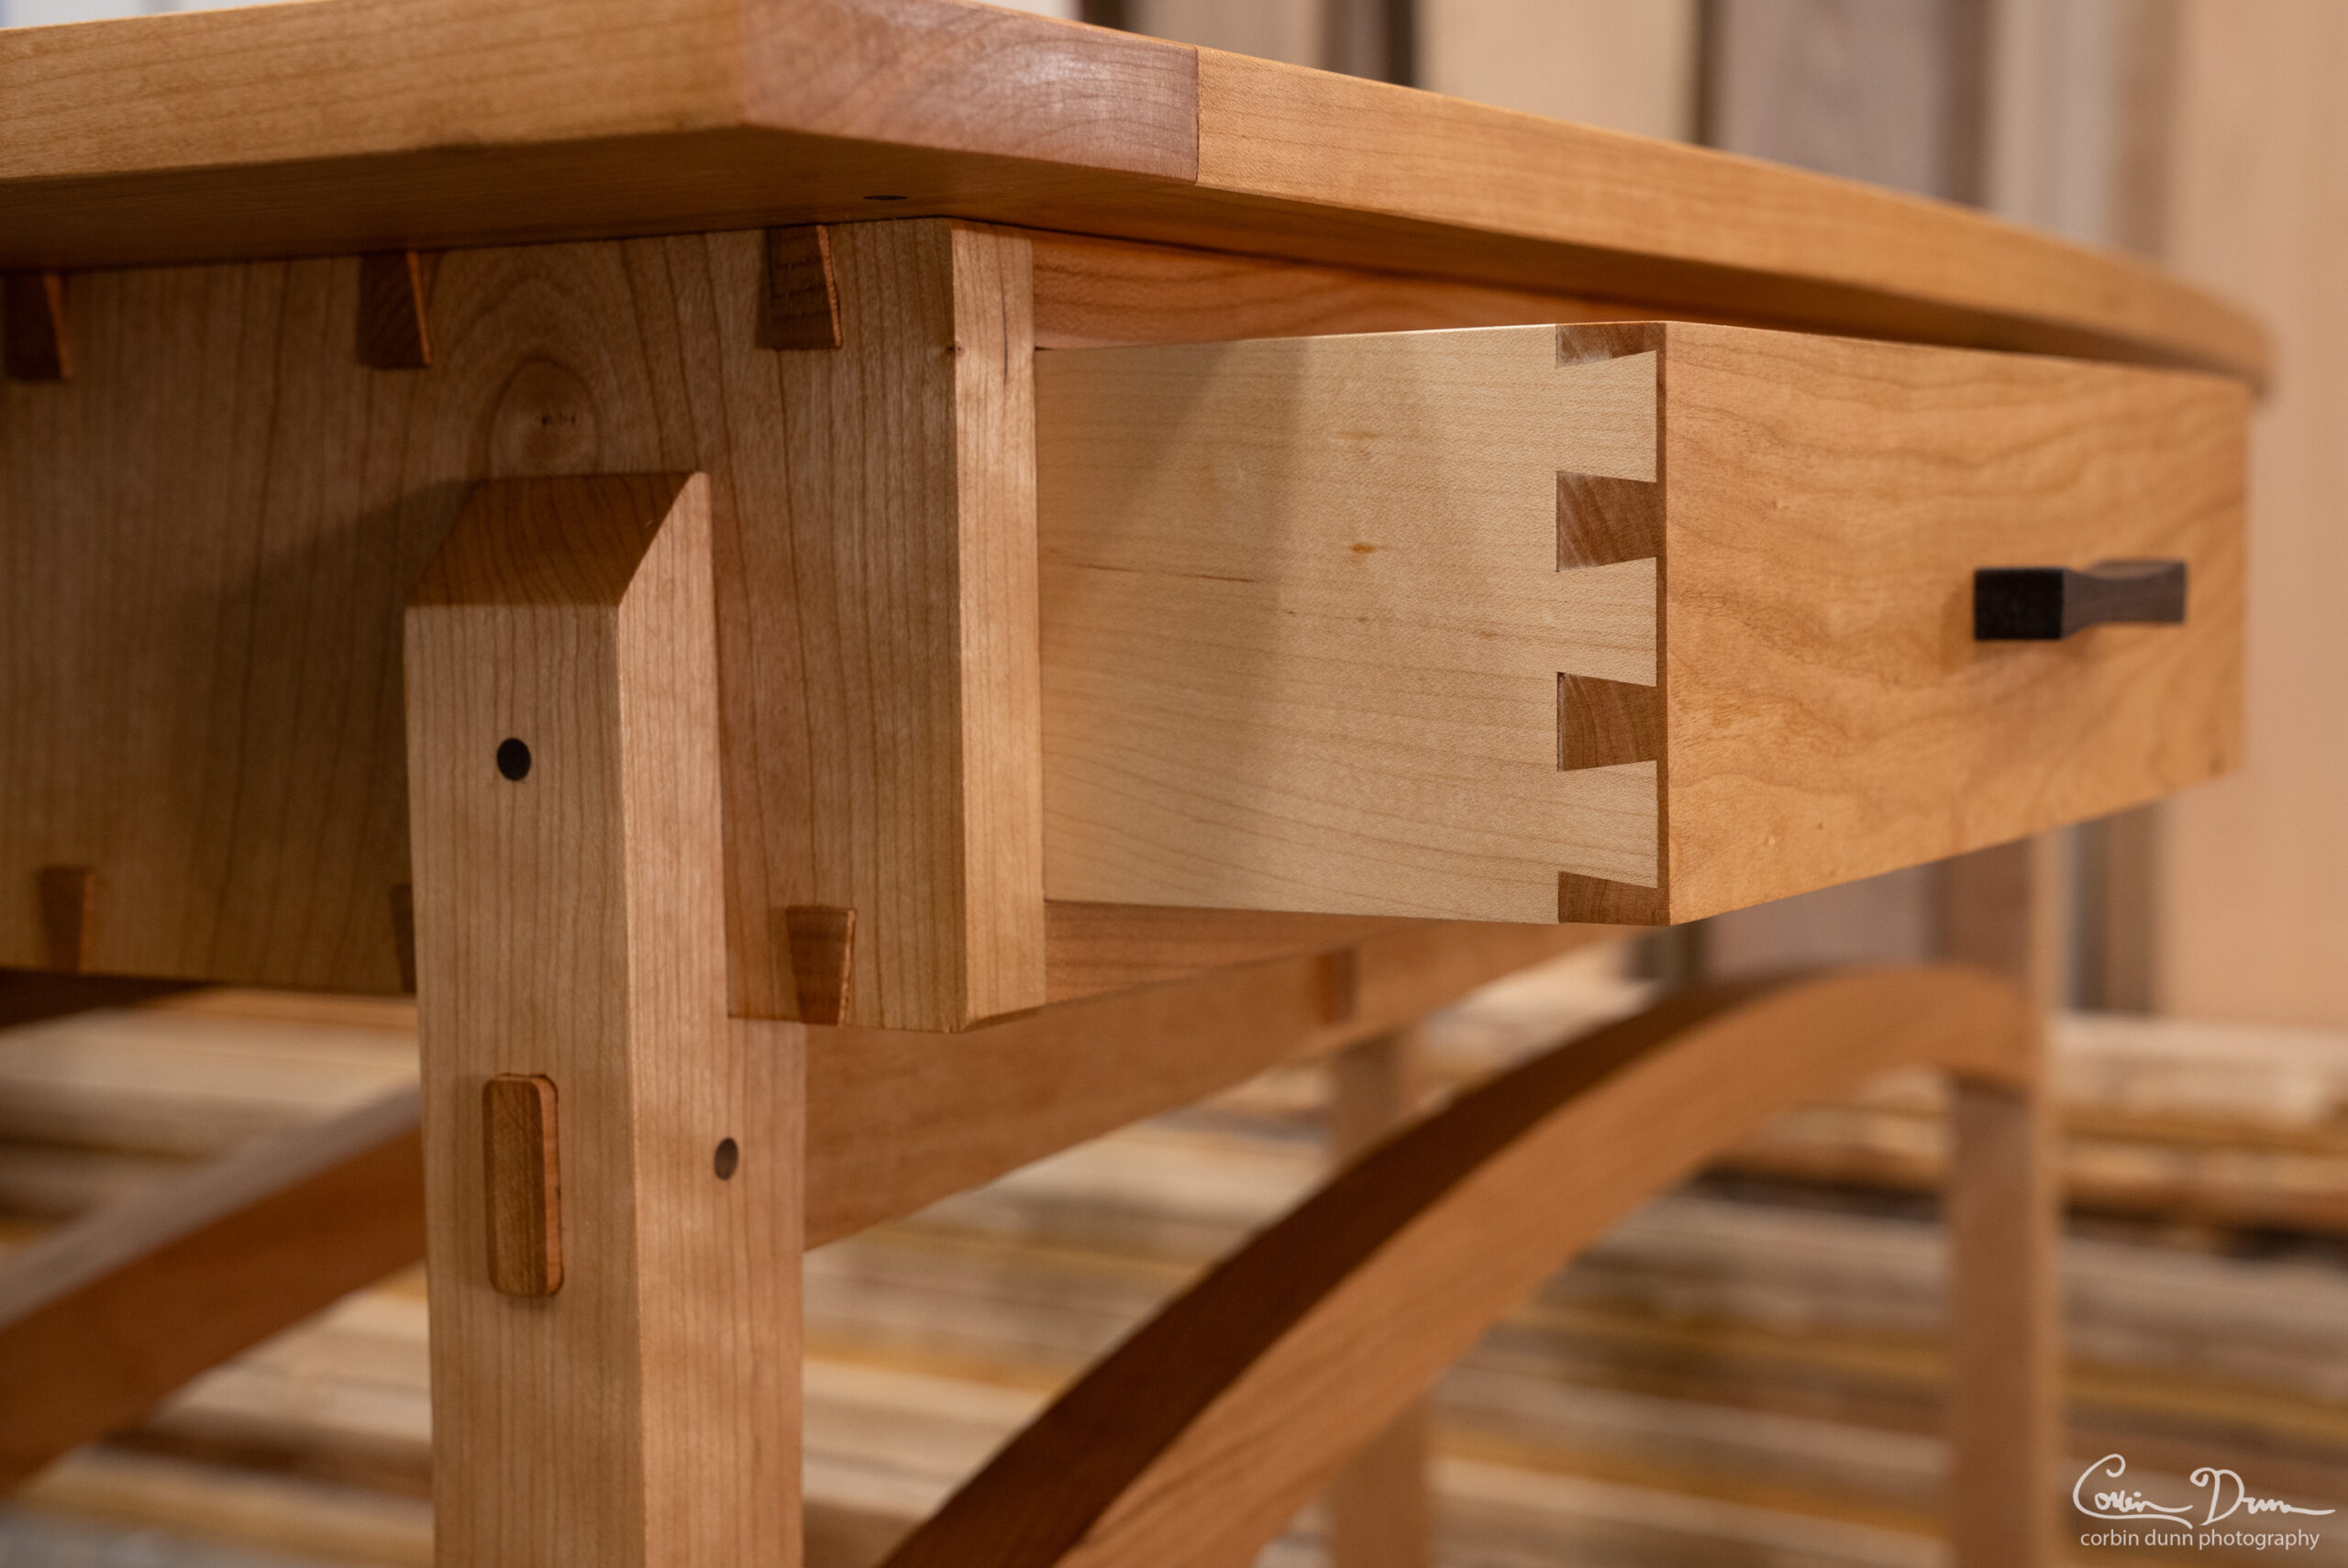
When I glued up the drawers I somehow got them slightly cockeyed, which is strange, considering I did check them with a square, but sometimes the act of tightening down the clamps can inflict more pain than medicine. I should have double checked them with a large framing square, as it would have been obvious that the back wasn’t quite perpendicular to the sides. The fronts themselves are designed not to be perpendicular, but are curved, so I couldn’t use them as a reference point, and it was an easy oversight. So, a few of the side dovetails didn’t come out perfect because of this, and you can see a tiny bit of maple glue dust filler in the above photo.
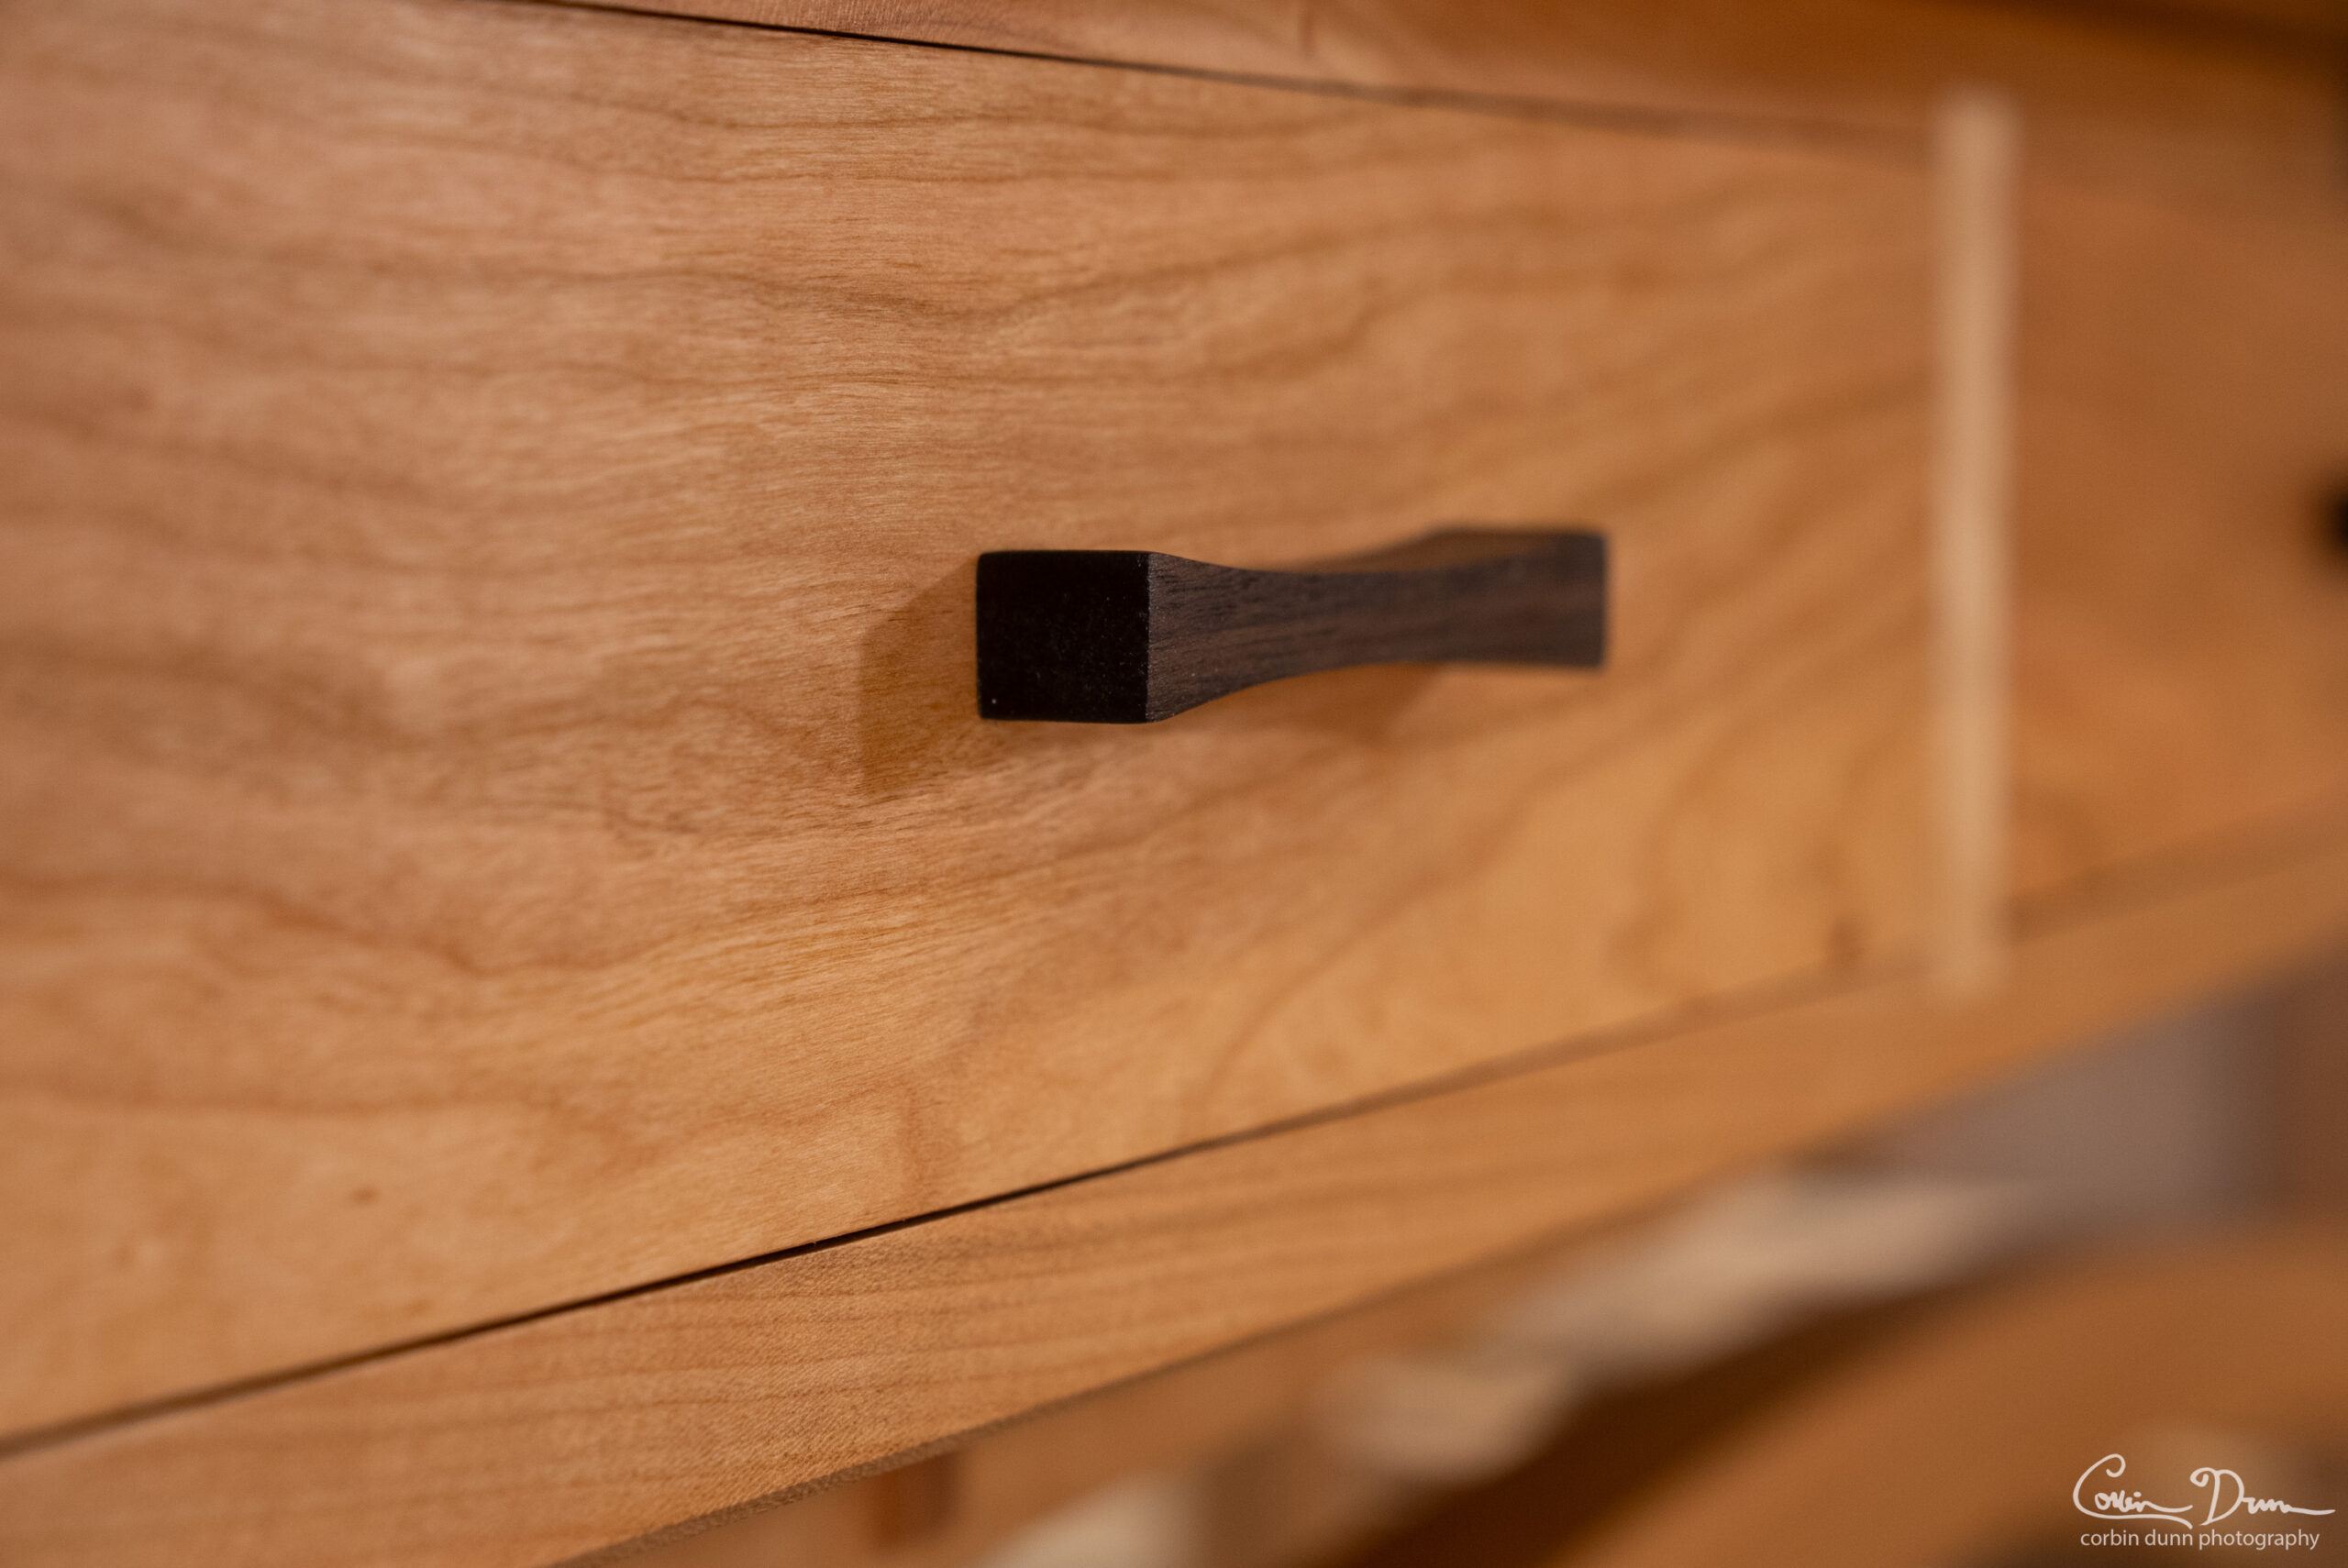
I feel like drawer pulls are always an afterthought to most pieces, and I wanted to create something that fit into the style, but not be too showy. I settled on a basic curve that would be easy enough to grab with the fingers, but not stand out too much. I screwed it on to the drawer front with two screws, but I think this would have been a good spot to simply glue it on. I was just a bit worried that the eventual repeated forces of opening and closing might eventually tear it off without some extra strength.
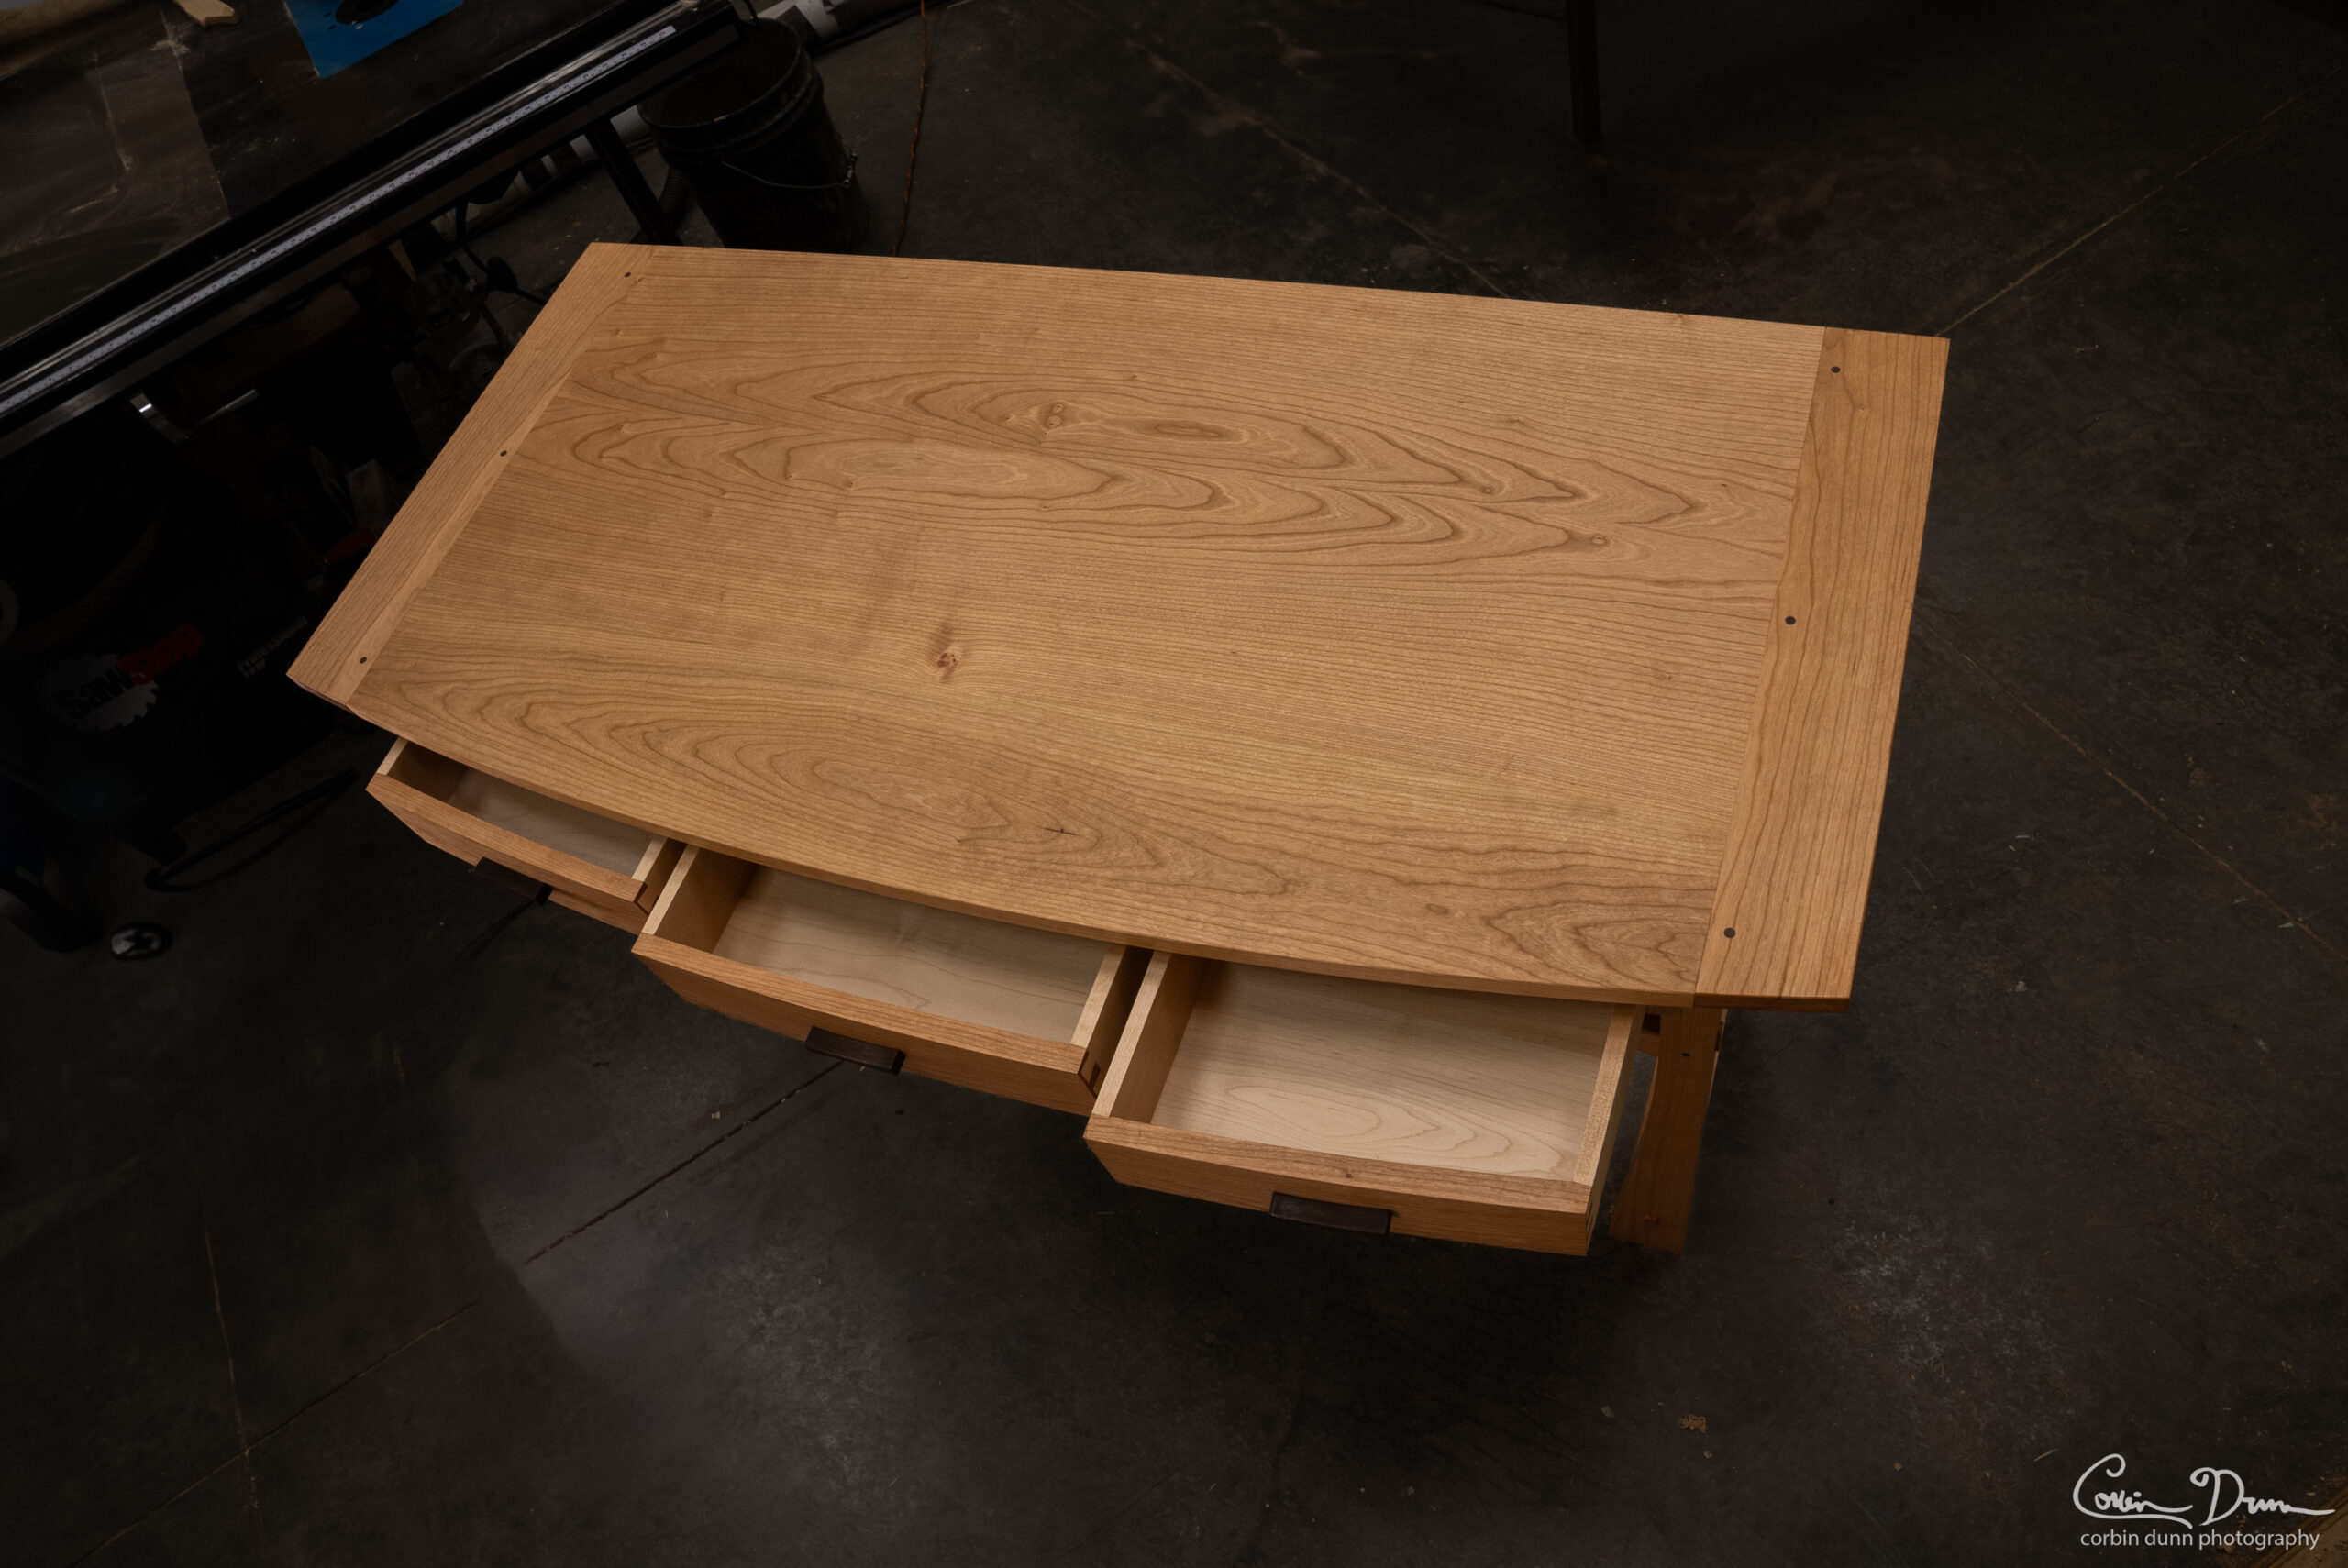
If you look at the piece you can see a main carcass that holds the drawers, and then a separate top with breadboard ends. I struggled with the best way to attach the top to the carcass. Now, the grain of the carcass all runs in the same direction, and this is essential for it to move together. This feels a bit strange when cutting the sides of the carcass, as the grain runs a short vertical distance and is really wide. Having a board with grain going perpendicular feels somewhat natural, but doing this would make the carcass tear apart during periods of different humidity. However, the top piece’s grain runs the same direction as the carcass…so I was thinking I might be able to just glue it on, and it would all move in tandem. I talked with my woodworking friend Jake about this, and he has seen too many horror stories of wood cracking, and suggested I screw it on. So, I ended up with some elongated screw holes in the carcass and did just screw it on.
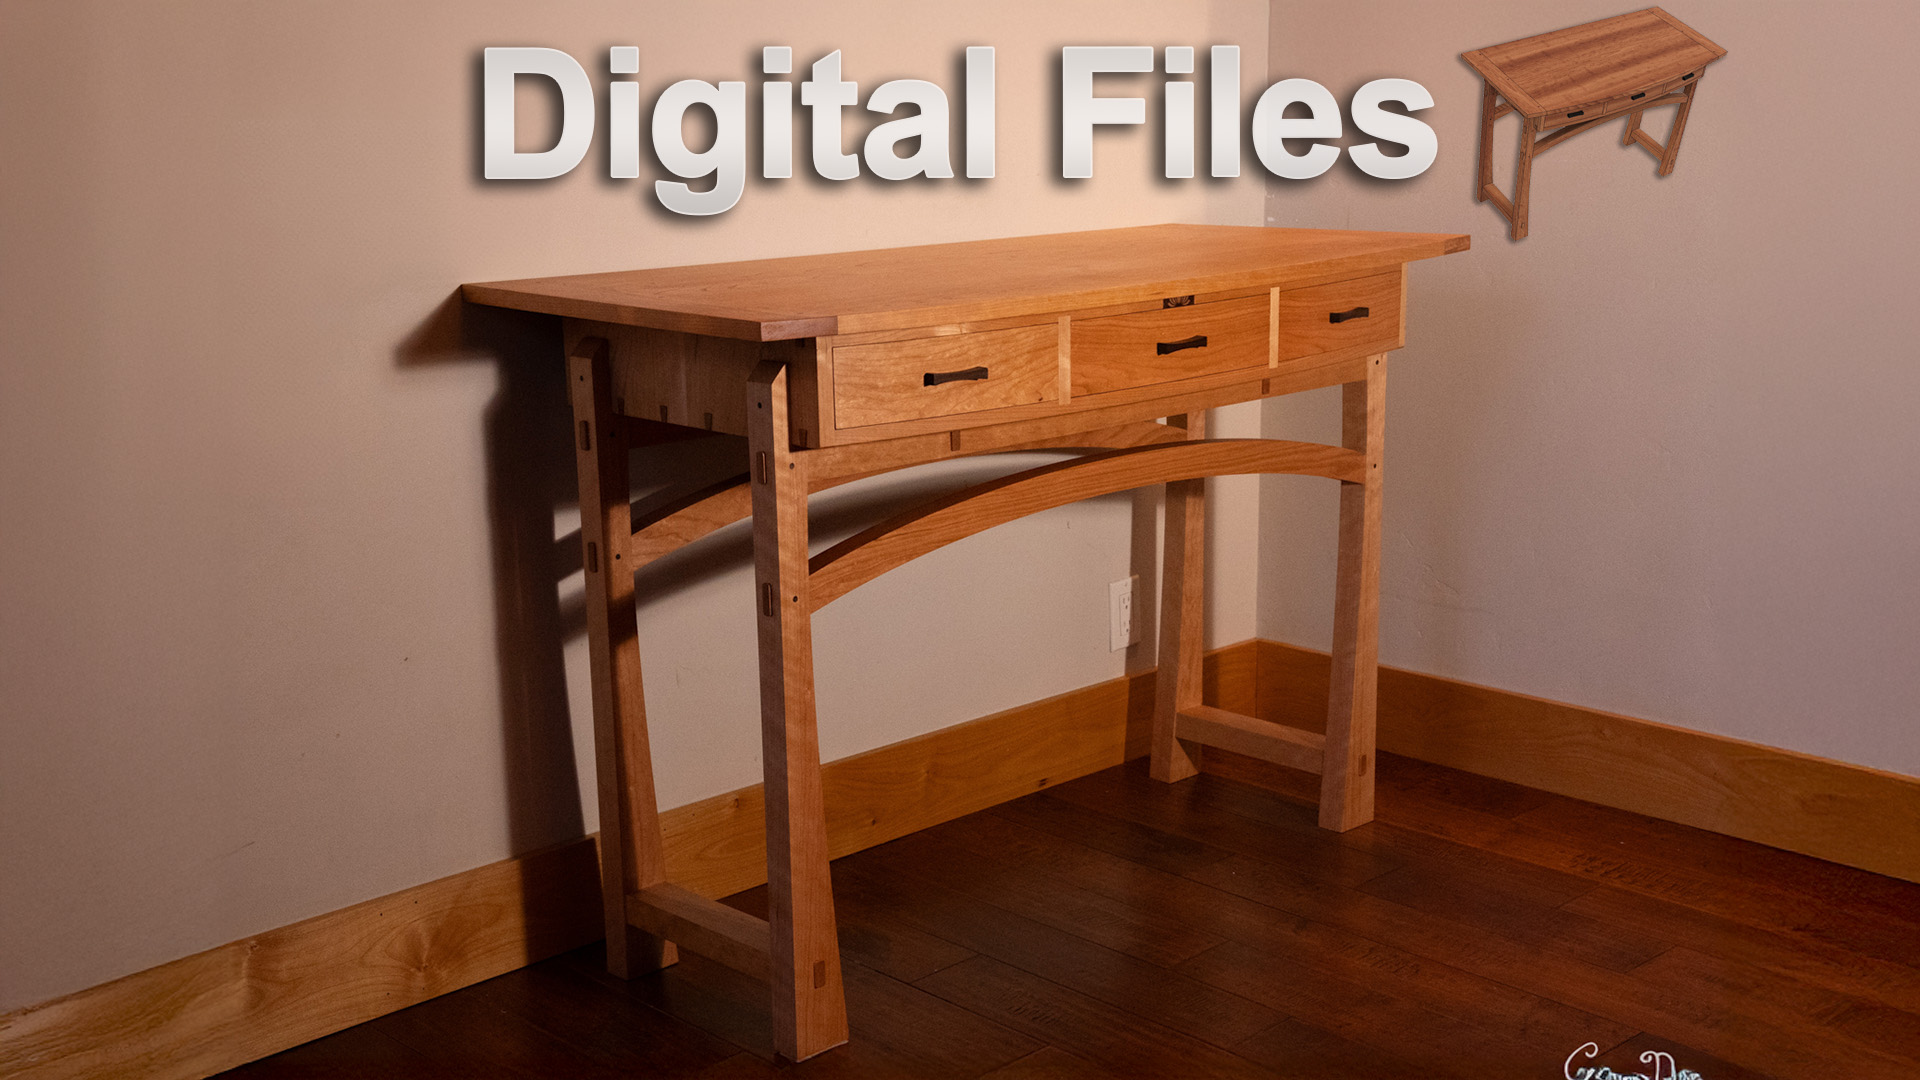
Like a lot of my projects, I made a set of digital files for people to download in case they want to to see how I designed this piece in Autodesk Fusion CAD or even try to make it themselves! The “Plans” are simply auto-generated drawings from the piece, which I didn’t use. I don’t usually do this, but I wanted to provide all the dimensions for anyone who might want to make it, but doesn’t have the skills to open up Fusion. Now for me, I simply looked at the digital CAD file when I was building it, and didn’t have to print out anything. Download the files for free over at Corbin’s Workshop: Digital Files – Curved Entry Way Table

It has been about two weeks since I released the video, and I’m quite happy with how well it has been received! Currently it has about 13,000 views, which is a lot compared to most my other videos.


Hey Corbin! That book looks great. Do you have a recommendation for a good cabinetry book? I’m planning on building a pretty large bookcase with cabinets below. I have a decent amount of woodworking experience but I’m looking for some tips/techniques on cabinets.
Hi Eric! Yeah, for woodworking cabinets I like Tauton’s book https://www.rockler.com/the-complete-illustrated-guide-to-furniture-cabinet-construction — it gives lot of ideas and options. What I don’t like is that it doesn’t tell you what is the best way to do it…but I guess that is subjective. But for Kitchen cabinets in particular I learned a lot from https://www.amazon.com/Building-Kitchen-Cabinets-Tauntons-Expert/dp/1561584703 — all are a bit dated these days…but woodworking hasn’t changed much (pre-CNC woodworking that is)
Oh, and I meant to say — superb table you have there. I particularly like the use of the dovetails across the top and bottom of the sides. They stand out beautifully!