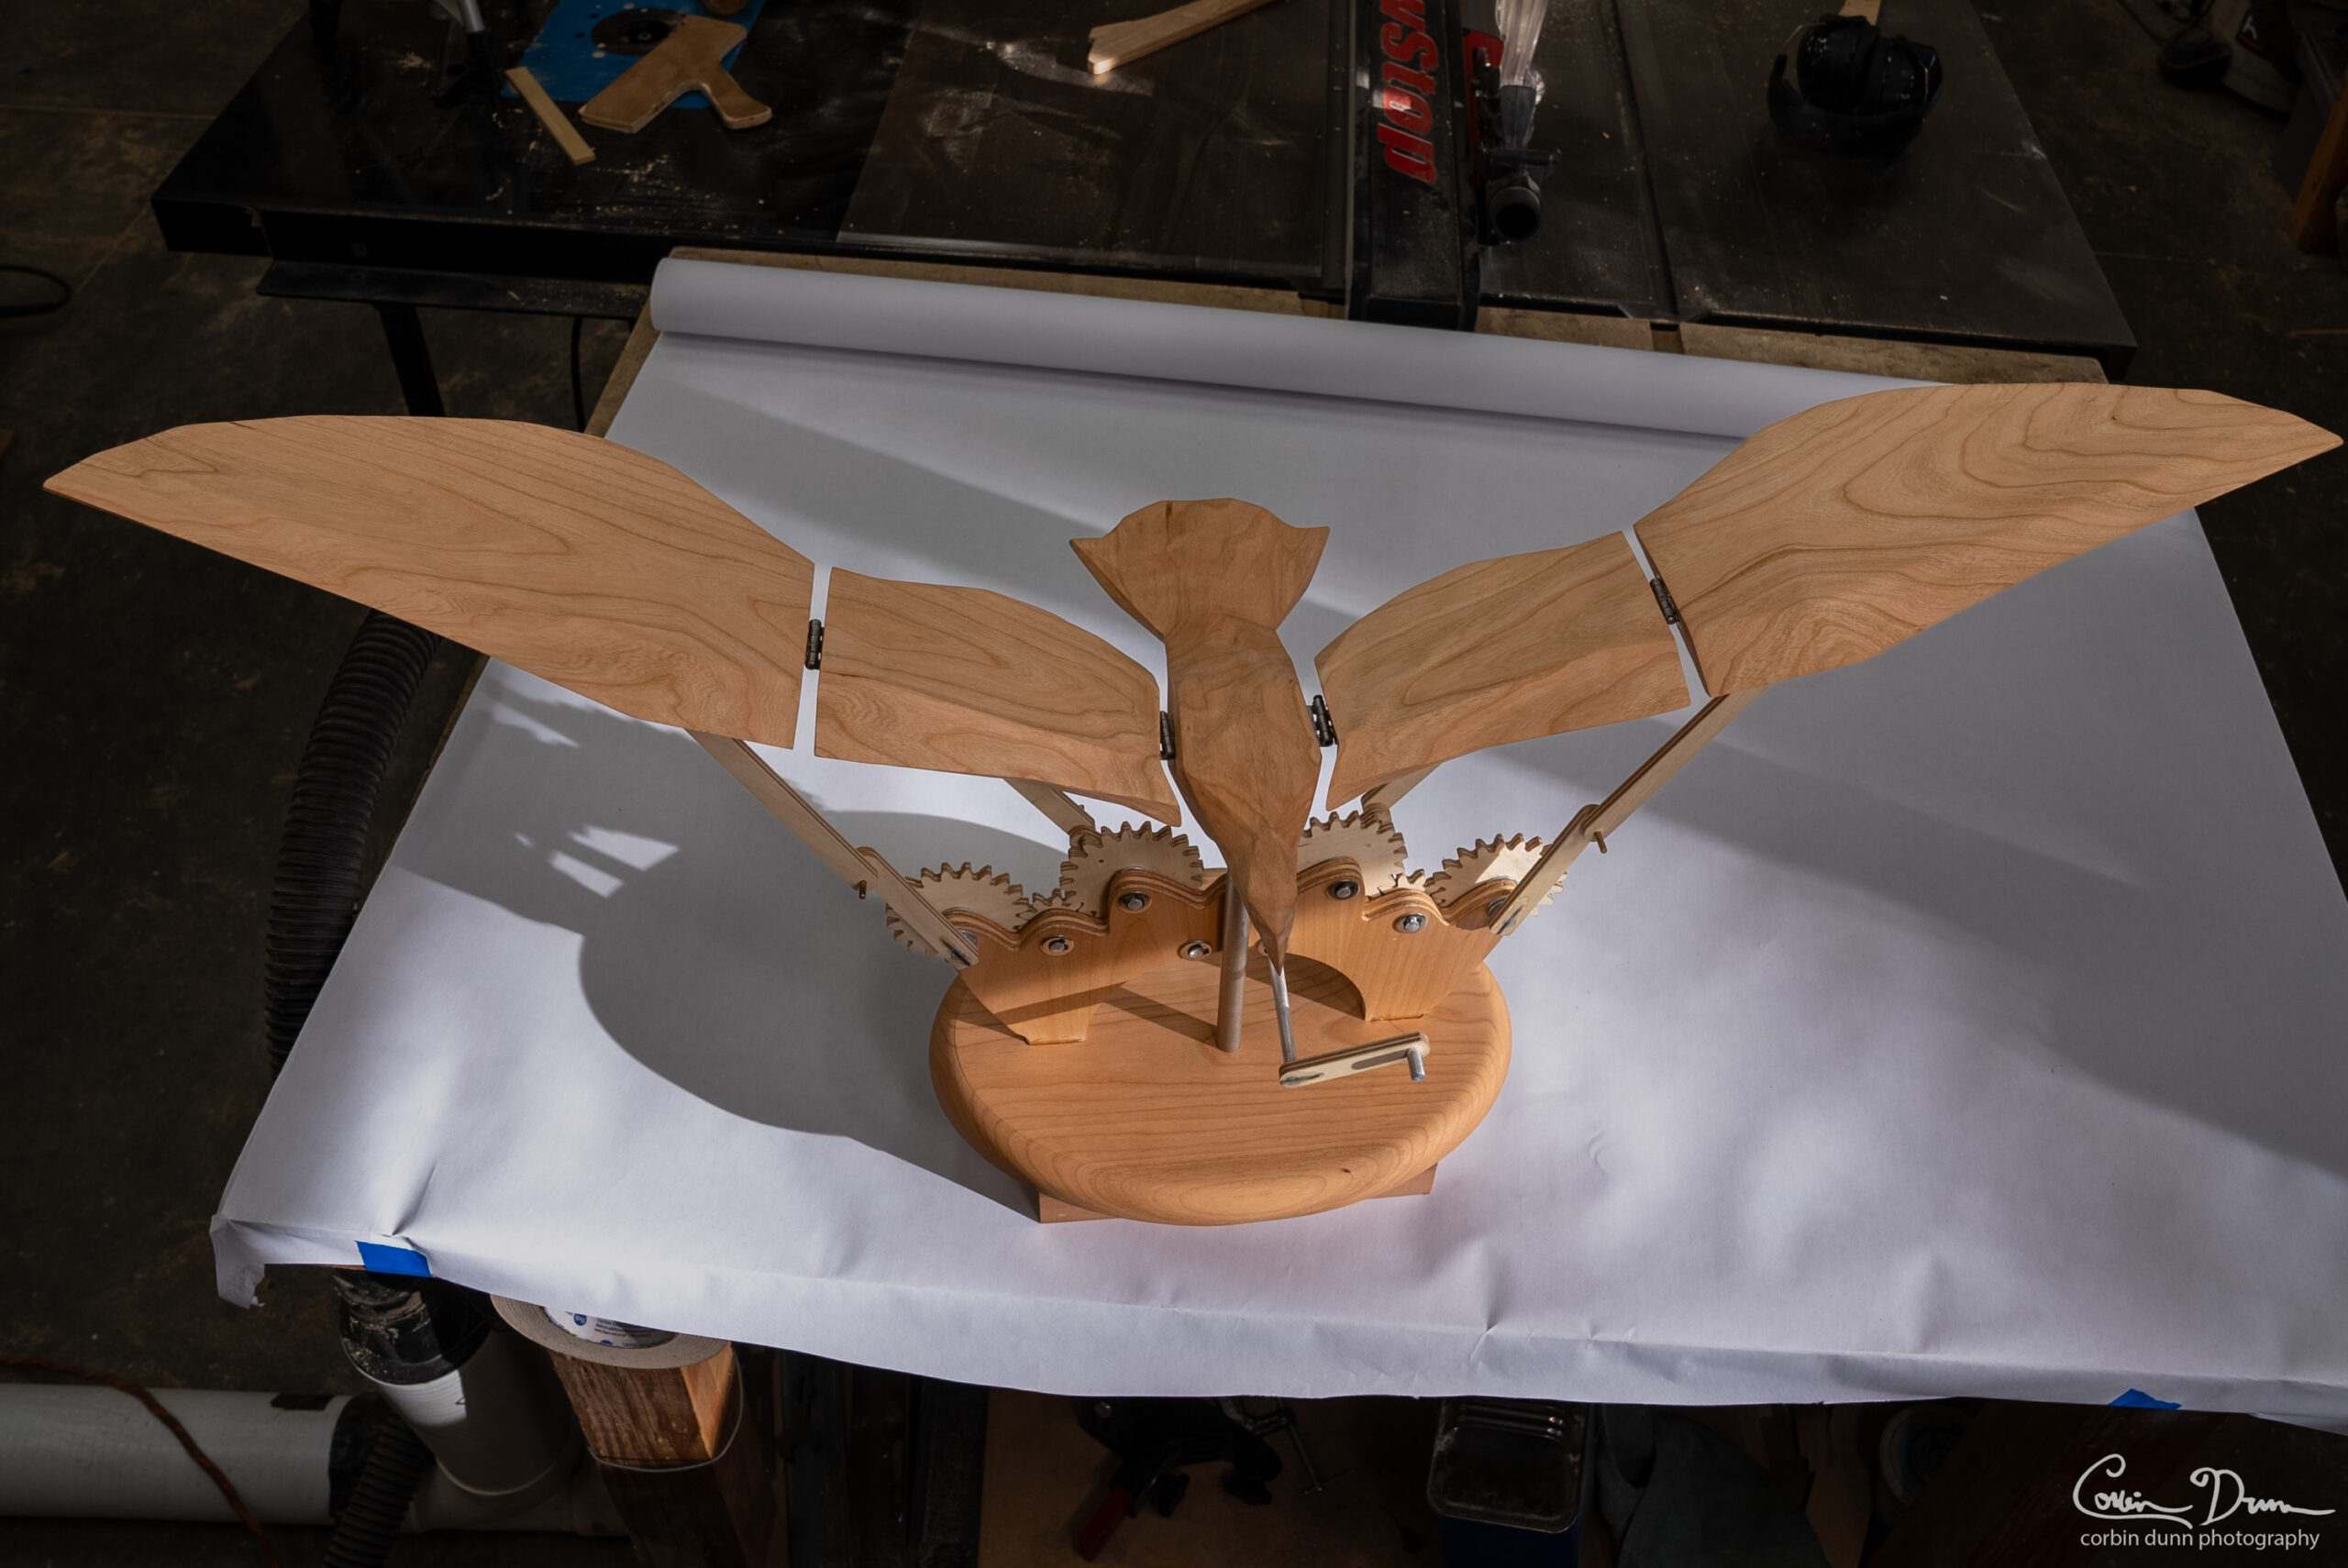
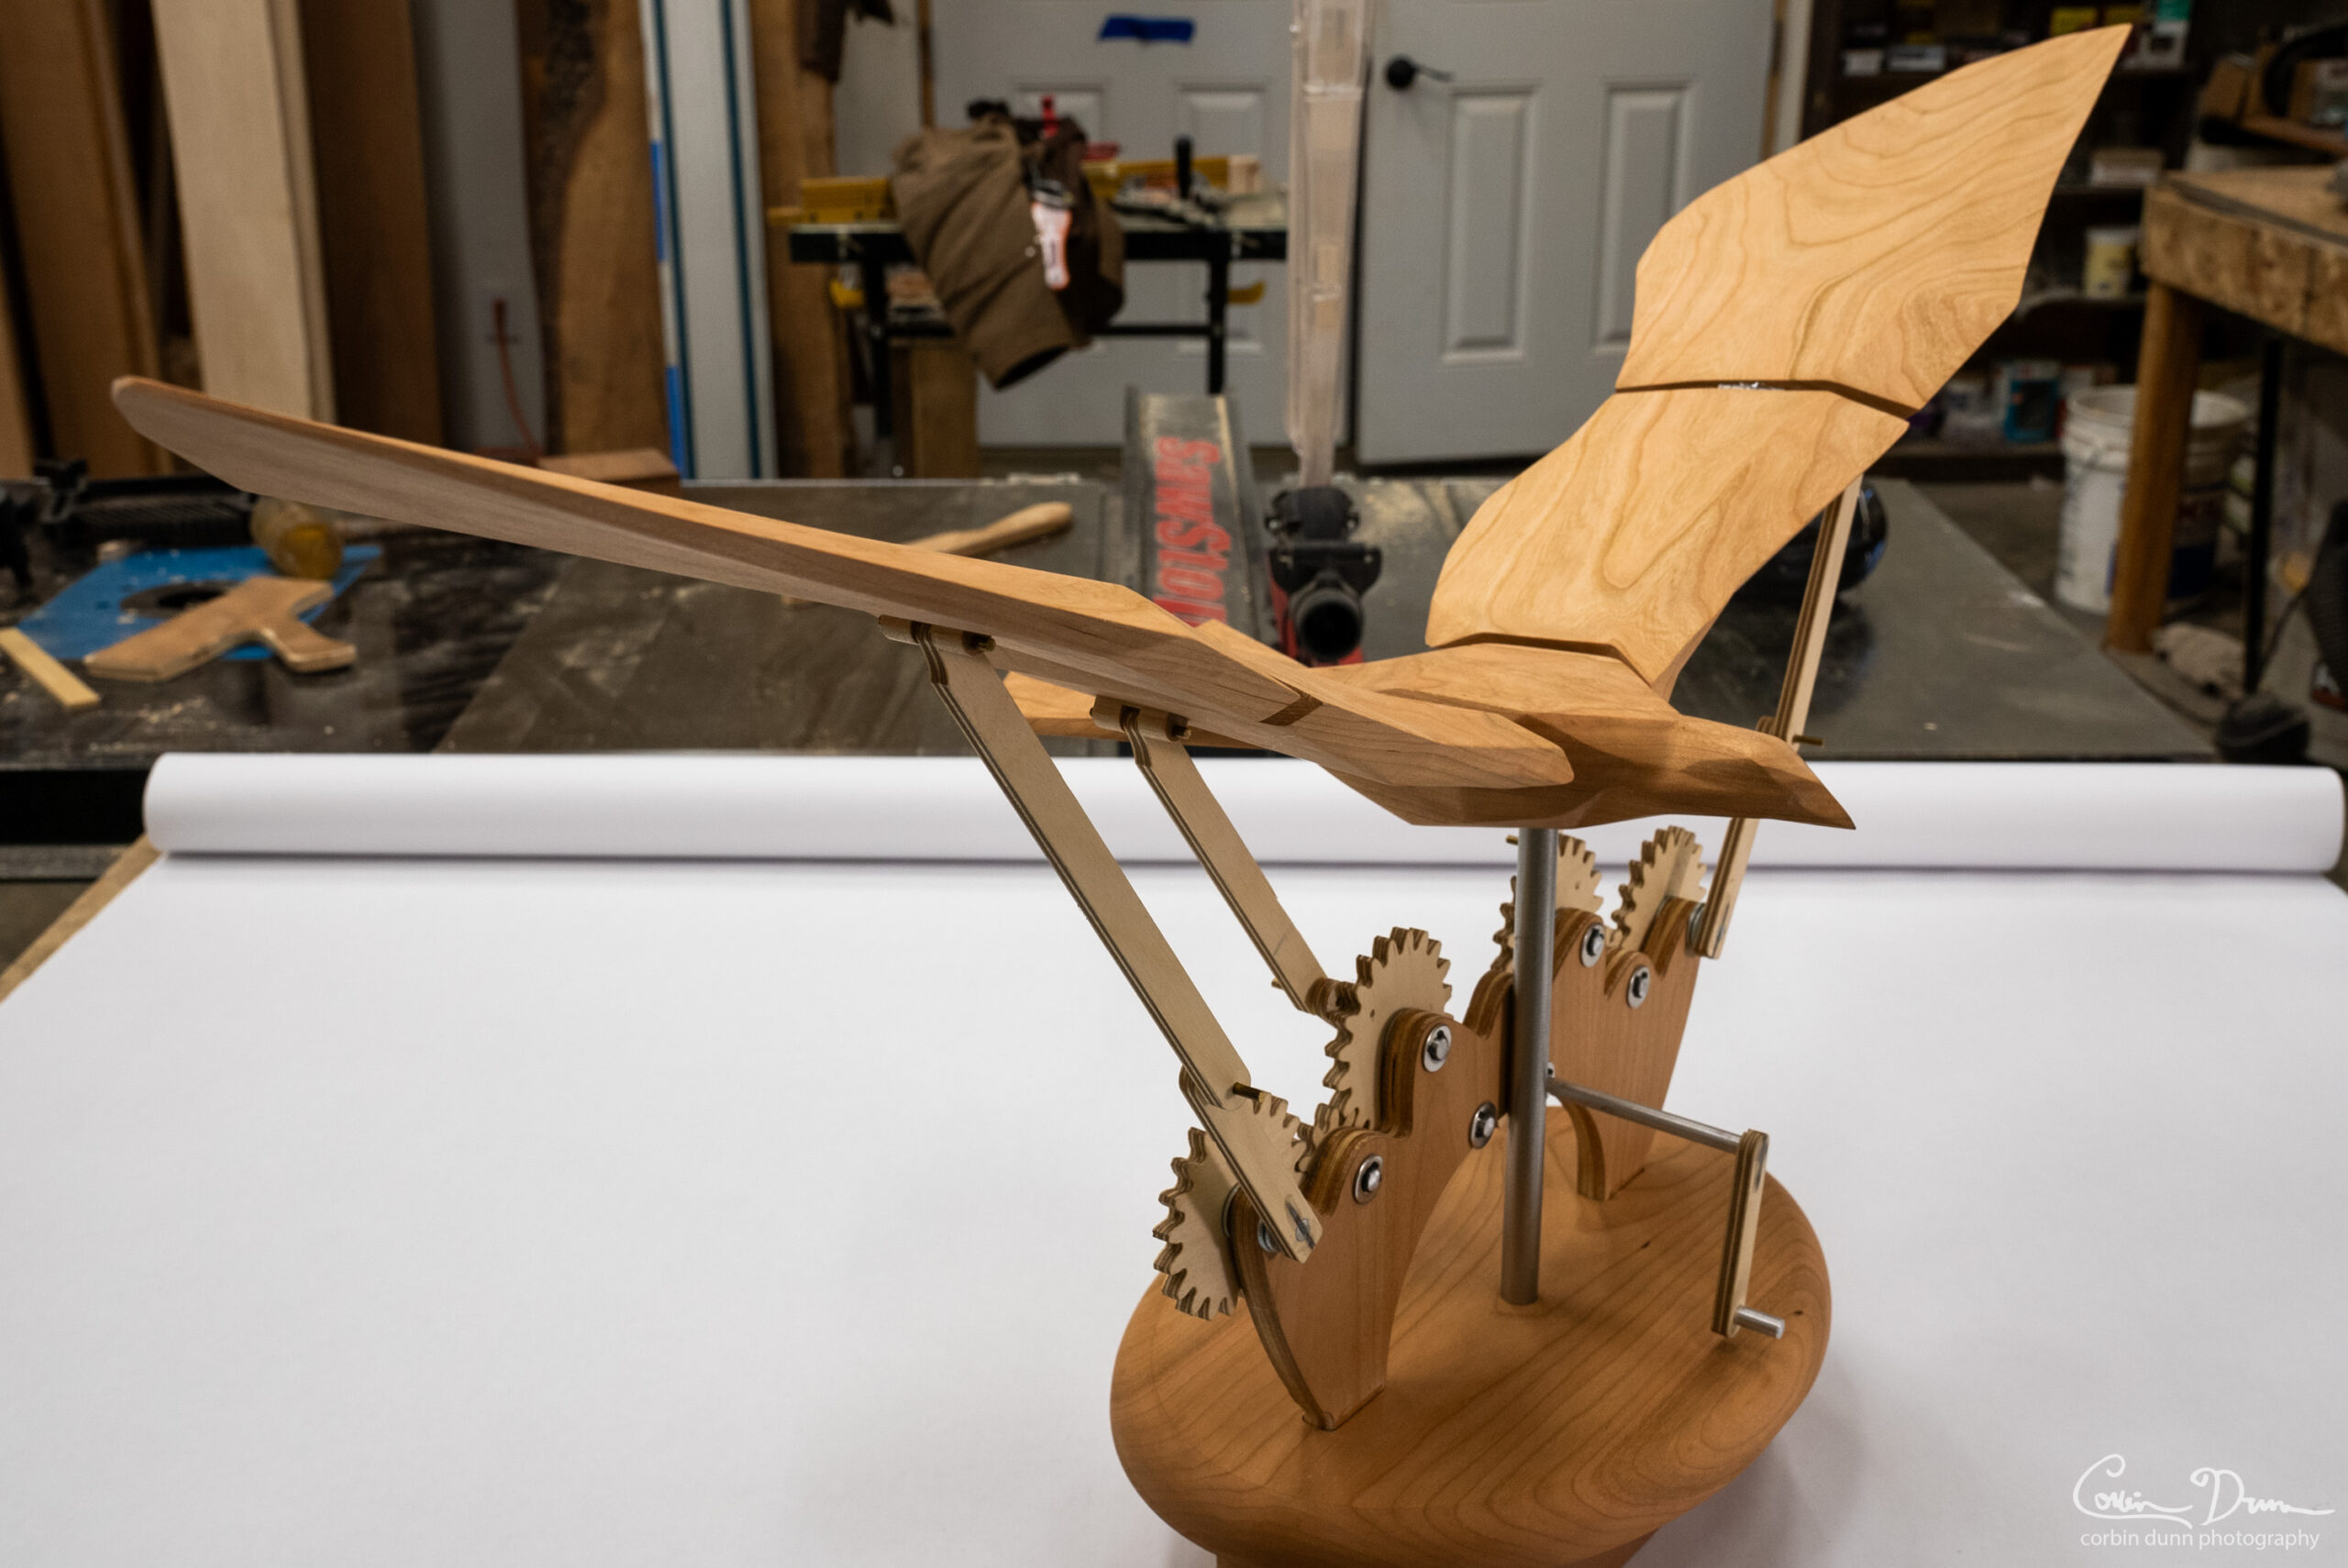
The Falcon Automata
This is a mechanical flying falcon automaton, powered by turning the crank arm in front of it to move the wings up and down. I recently just realized that “automata”, which is what I’ve been calling it for a while, is the plural for automaton, and there are two main ways to pronounce it in English, and I’m sure I pronounce it wrong. I like to say “auto-mah-tah”, but I also hear it “ah-tom-a-tah”.
Before I get too deep, you can download all the digital files for this project for free: Falcon Automata Digital Files, and watch the Falcon CNC Woodworking Project on YouTube.
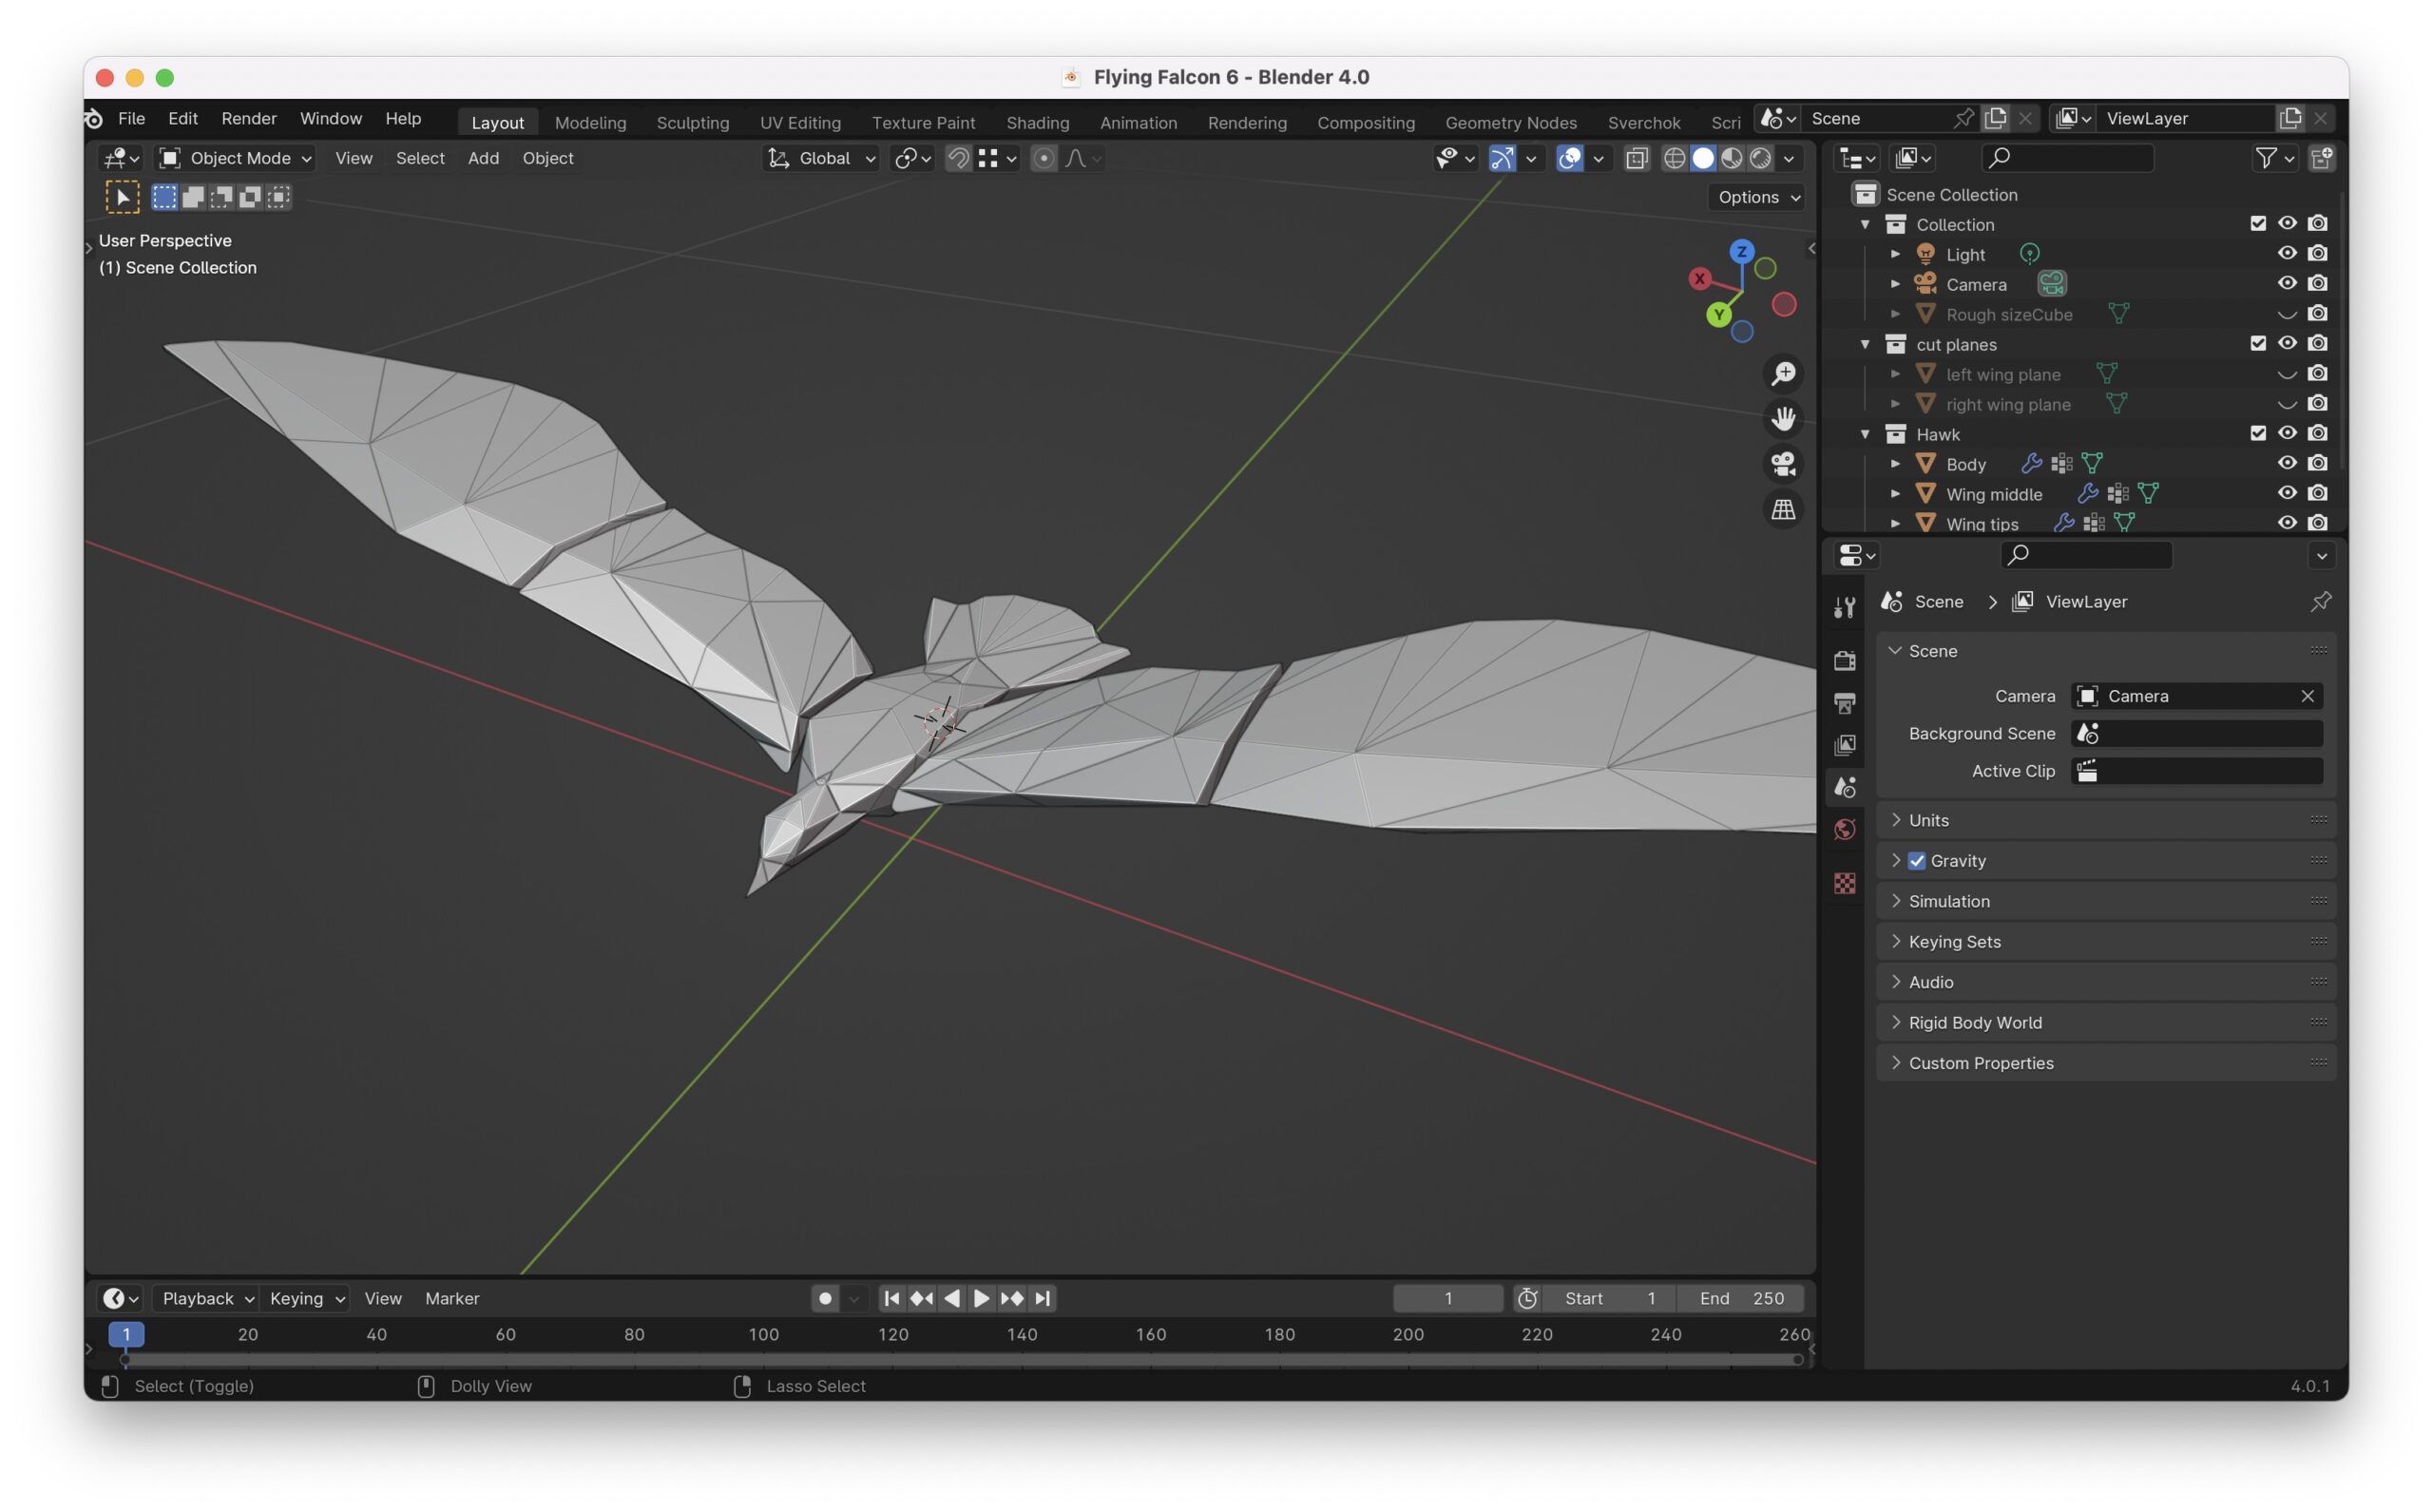
I’ve been wanting to make some type of mechanical wood animal ever since I saw Amao Chan’s 3D Printed Automata: Amao Chan’s YouTube Channel. I printed up the turtle that he designed, and it is just amazing how well it works. For the past several years I’ve been casually working in Blender on some of my own animal designs: birds, turtles, dolphins. I really wanted to have it be my own sculpture, and not a direct derivative of what someone else had done, but I realized I’m not a very good 3d sculpture artist. Eventually I did do this derivative based falcon sculpture, but I really only used the original model as a base piece of virtual clay, and molded it into something unique.
What really kicked me into gear on designing and finishing this project was seeing Blake Mcfarland’s Shark Automata, which is pretty amazing. He is definitely an amazing sculpture artist, but I also know that he frequently hires a 3d designer to create a model for him to base his projects off of. But still, his hands do all the carving of the actual wood.
This project took me a good three months to do, but my interest in it waxed and waned, and I wasn’t very focused on it. There were so many new things for me to learn, and new problems for me to solve. Plus, spring was arriving in Lake Tahoe, and I wanted to start to get outside more on my mountain bike.
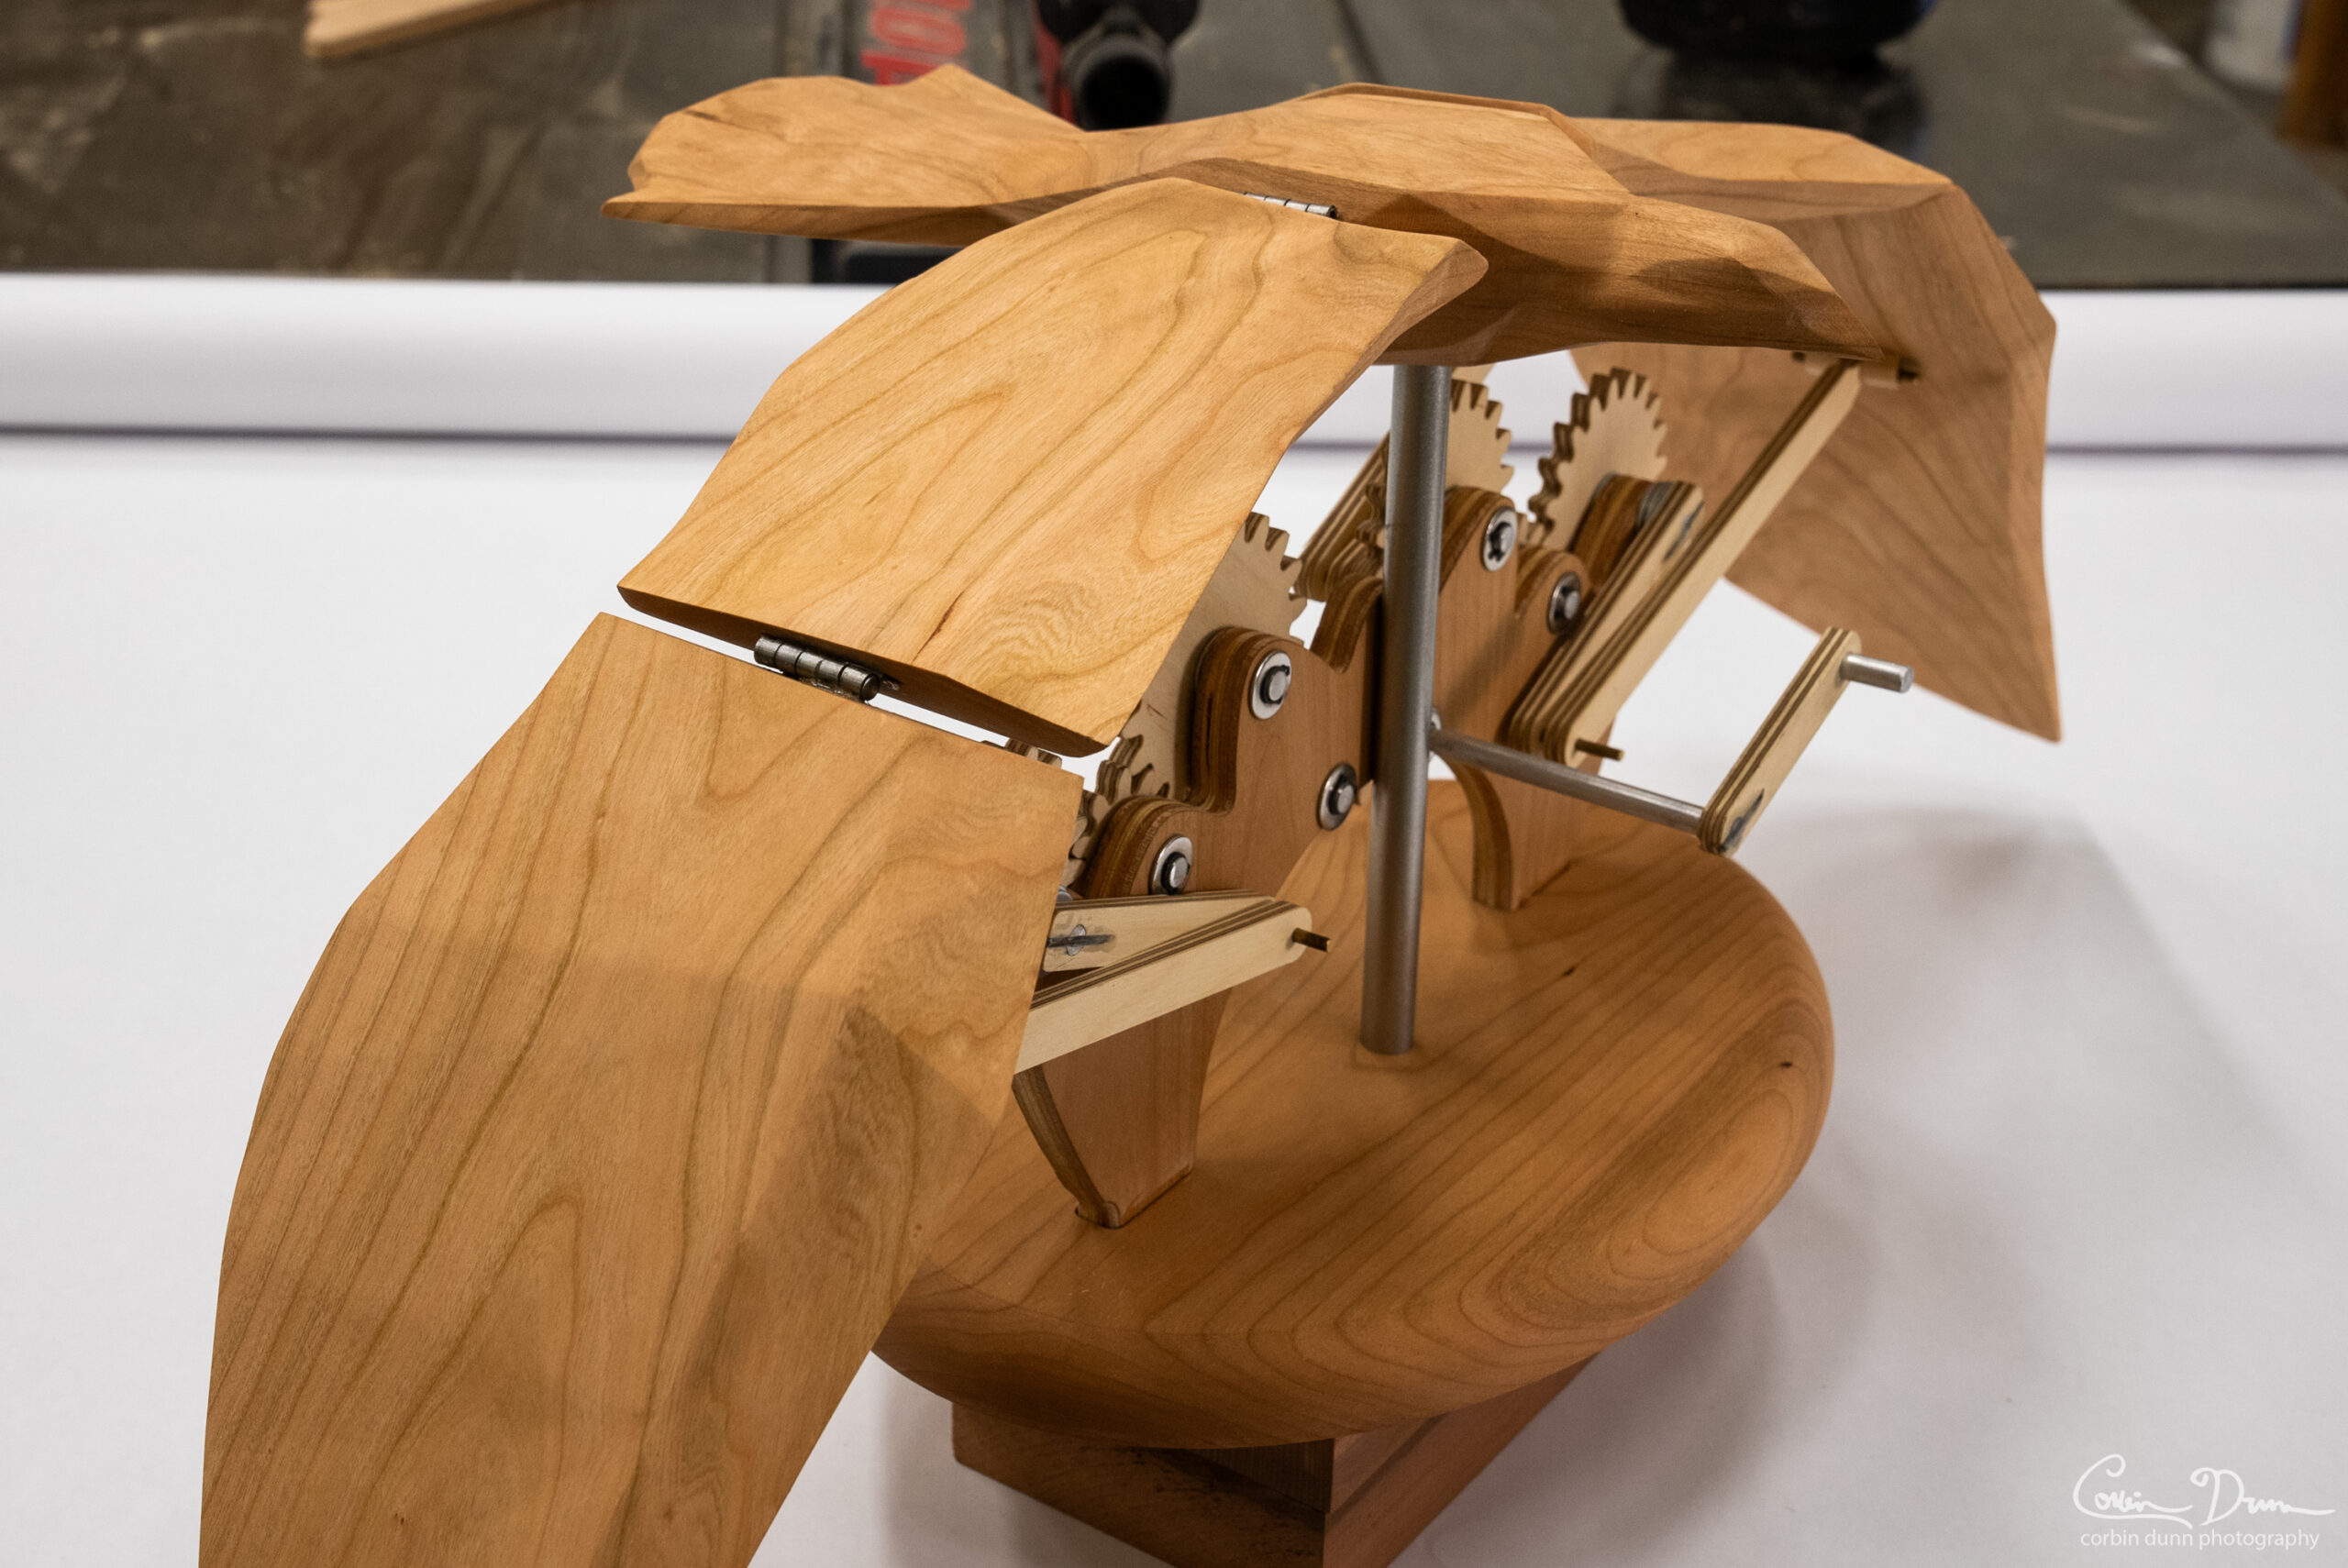
I split up the model in Blender and imported the pieces into Autodesk Fusion to complete the mechanical parts. It took me a while to figure out how to best organize all the gears and get the mechanical layouts to function fluidly and bird-like. I thought the best practice was to create individual components and move them around to desired locations, but this was incredibly difficult to accurately test movements. Instead, it was best to create a “master” sketch that contained all my basic mechanical pieces. I could tweak the locations and have related pieces automatically update in size, which proved to be the easiest way to find the best motion through trial and error. I mention this in my build video, but Disney Research has some software that would have easily allowed me to compute these locations. The software was never published, and I didn’t want to figure out how to create it myself, so I had to go with the trial and error approach.
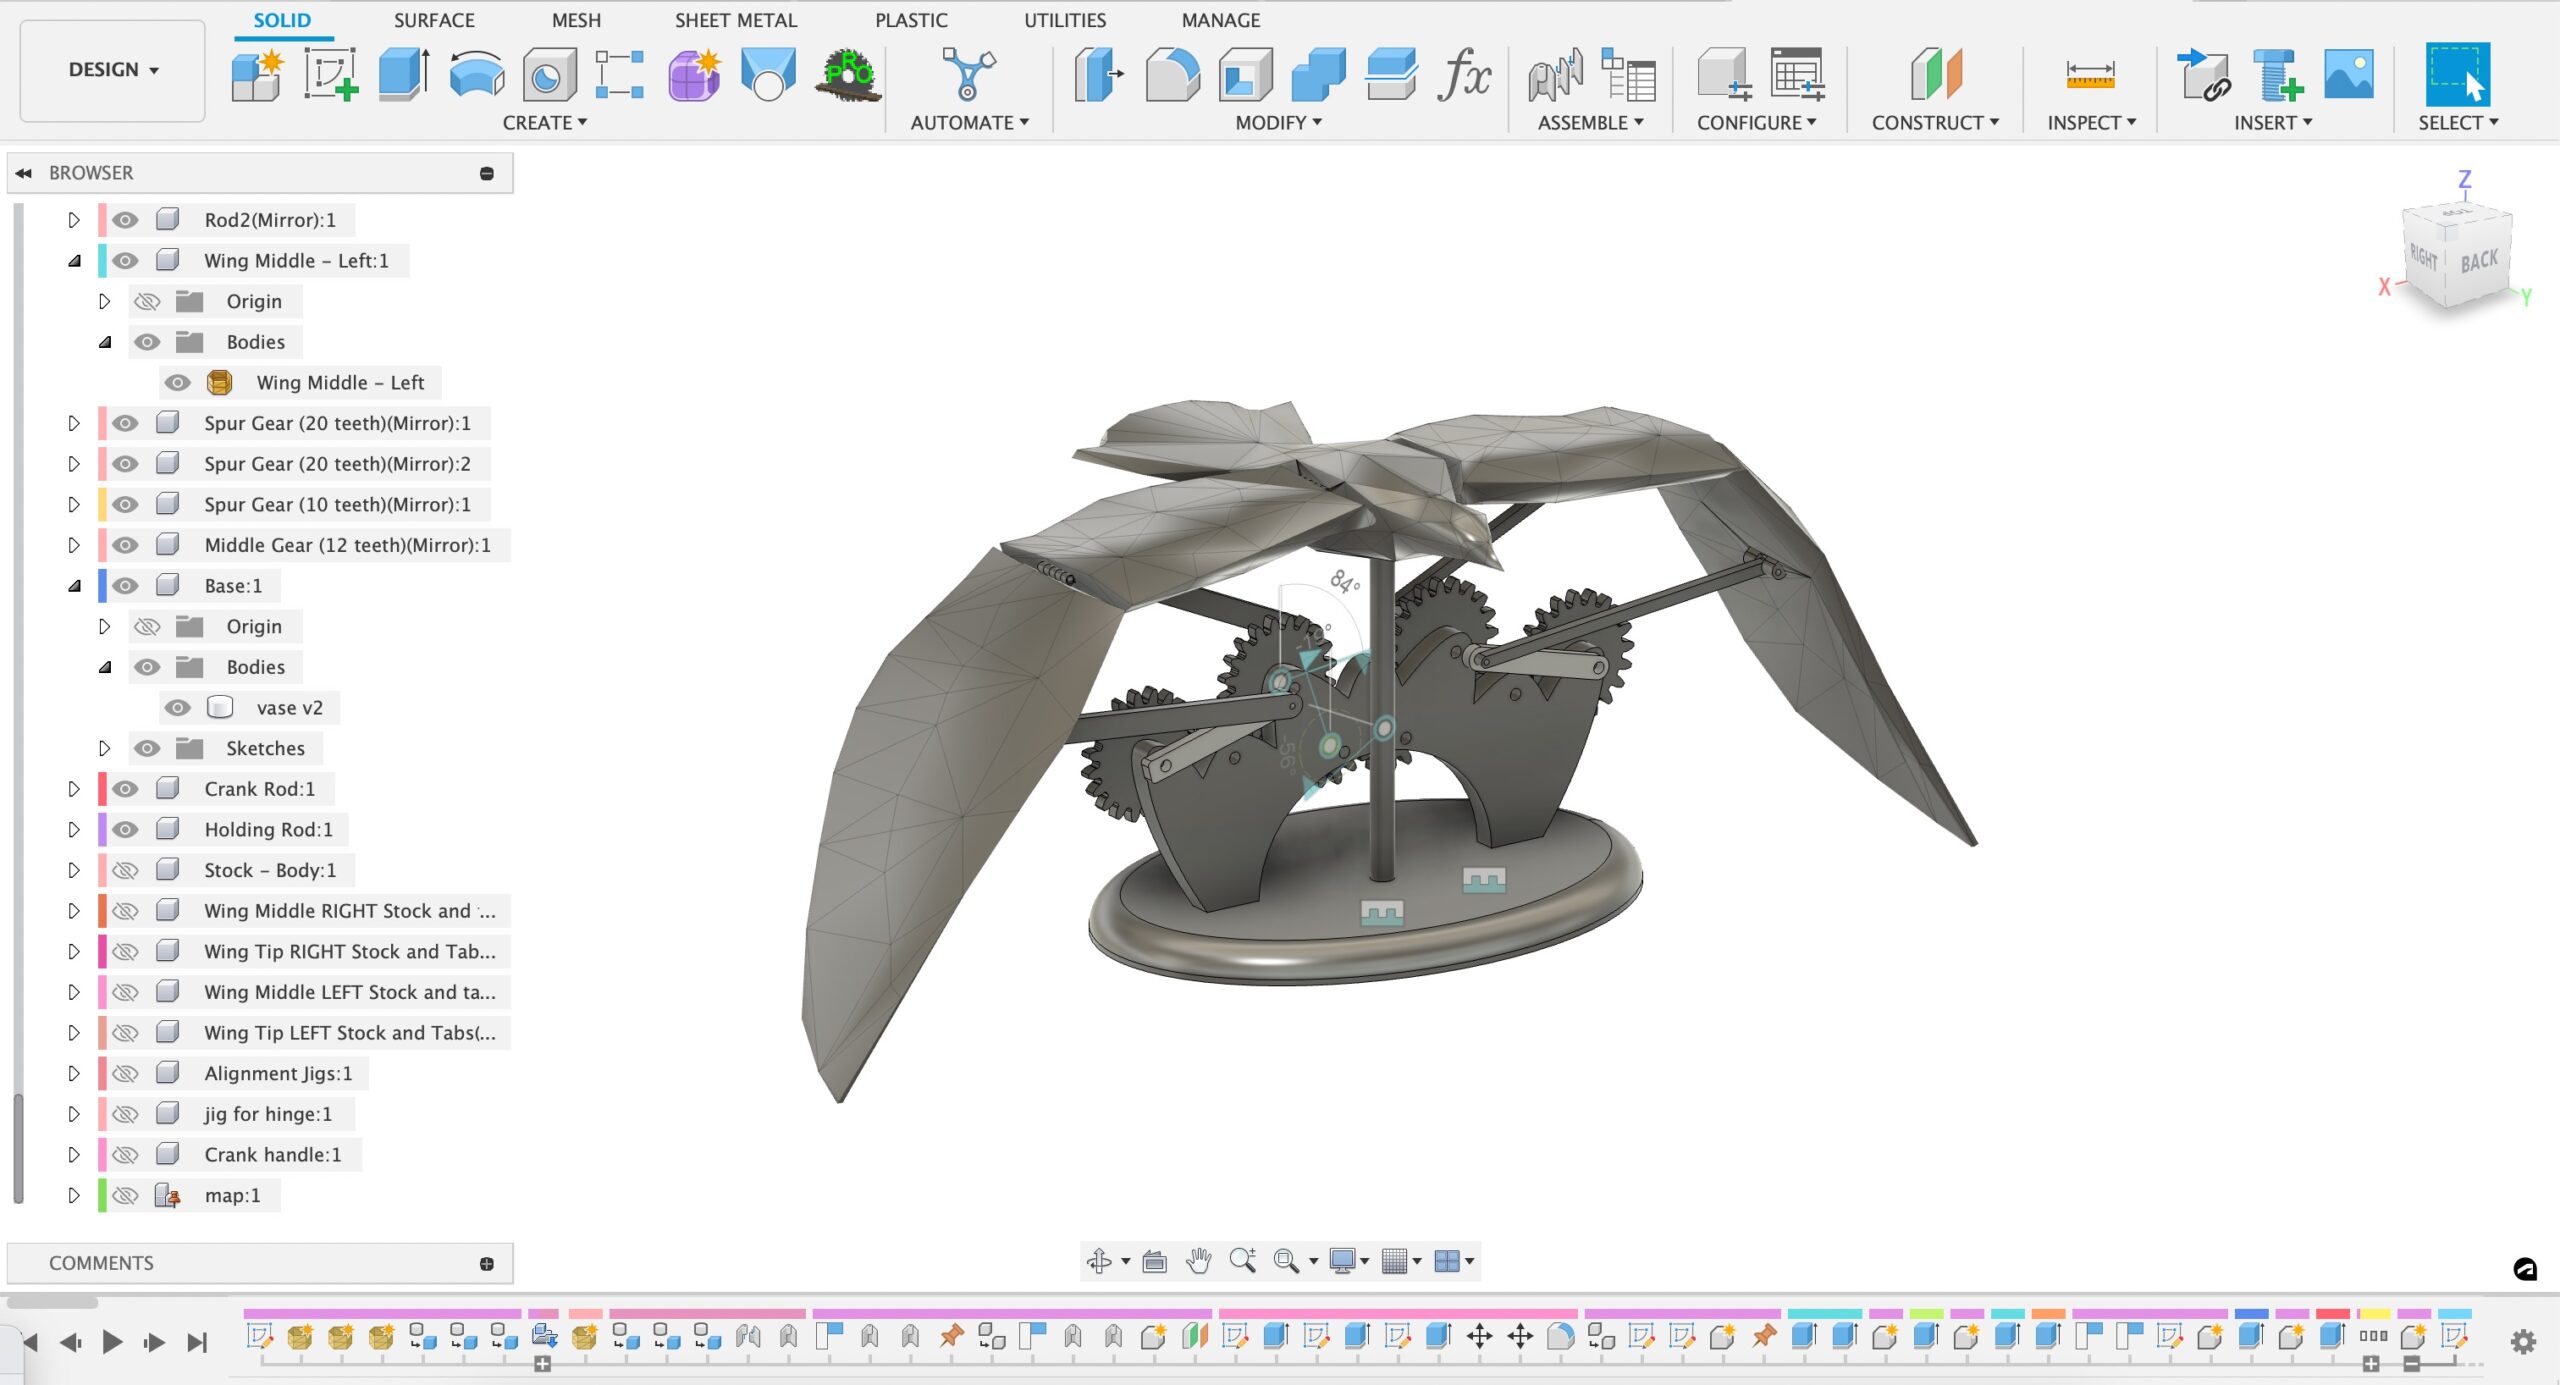
The first physical piece I started to create were the gears. I needed to see if they would actually work, and to my surprise it seemed fairly easy to get all the gears to mesh together. I’m new to gear creation, and I used the default Fusion 360 Spur Gear Plugin that it comes with, but I’ve heard this Multi Spur Gear Plugin might be easier to use (at $10, which isn’t too bad).
I really needed to figure out a better way to connect the gears onto the shafts. I didn’t design those details in my model, and this caused me a little bit of trouble in real life. I had to groove and slot some things for clearance, and my idea of simply gluing the gear shafts onto the gears wasn’t strong enough for the forces involved. The glue didn’t hold on its own, and I had to slot the shafts and place a piece of wire into them as a keyed shaft to prevent slippage. This area of the design really needs some more thought.
Machining the model itself wasn’t too difficult. The main issue I had involved using Vectric VCarve for my toolpaths (CAM). I started with VCarve for the body carving, and I had the spindle collide with my workpiece while machining. This type of problem can easily be avoided in Fusion, and I immediately decided to do the rest of the CAM in Fusion. The biggest issue was how to properly do “tabs”; they are incredibly easy in VCarve, and they are actually just as easy in Fusion, but you have to have a little more knowledge on how to do them (queue upcoming tutorial video!).
The next difficult part was how to hold the odd-shaped wing pieces in order to slot them for the hinges. I ended up machining some “soft jaws” that were the inverse shape of the wing. This worked great for the wing, but didn’t work for the body. Luckily, the body was flat enough to mount on its own. At this point, definitely check out the build video where I discuss a lot of these details, and at the end you can see it working!
And one last photo of the project from the top. The finish is “Osmo PolyX Oil”, in matte. No shine at all, and it looks like bare wood.