Kitchen Remodel: Black Concrete Countertops
I’ve been wanting to remodel my kitchen ever since I first moved into my house over 10 years ago. I am finally getting around to it, and concrete countertops have been in my idea plan for at least 6 or 7 years. I’ve done a few previous ones for smaller house projects: my Scuplin IPA Utility Sink Counter that I made back in 2015, and first one as a bathroom vanity countertop. I’m building my kitchen in sections, and I got one section installed and was in need of a pair of countertops that sit to the sides of my stove. Here’s a picture process of what we did:
First, I hacked together a level table by screwing some 2x4s on top of sawhorses and then a ¾” sheet of plywood on top of that. I leveled the feet of the sawhorses in my garage. On top of that I built a mold for each counter out of ¾” malemine. These are designed to be slightly under 2” thick. I didn’t want the typical 1.5” top, and I didn’t want an overpowering 3”.
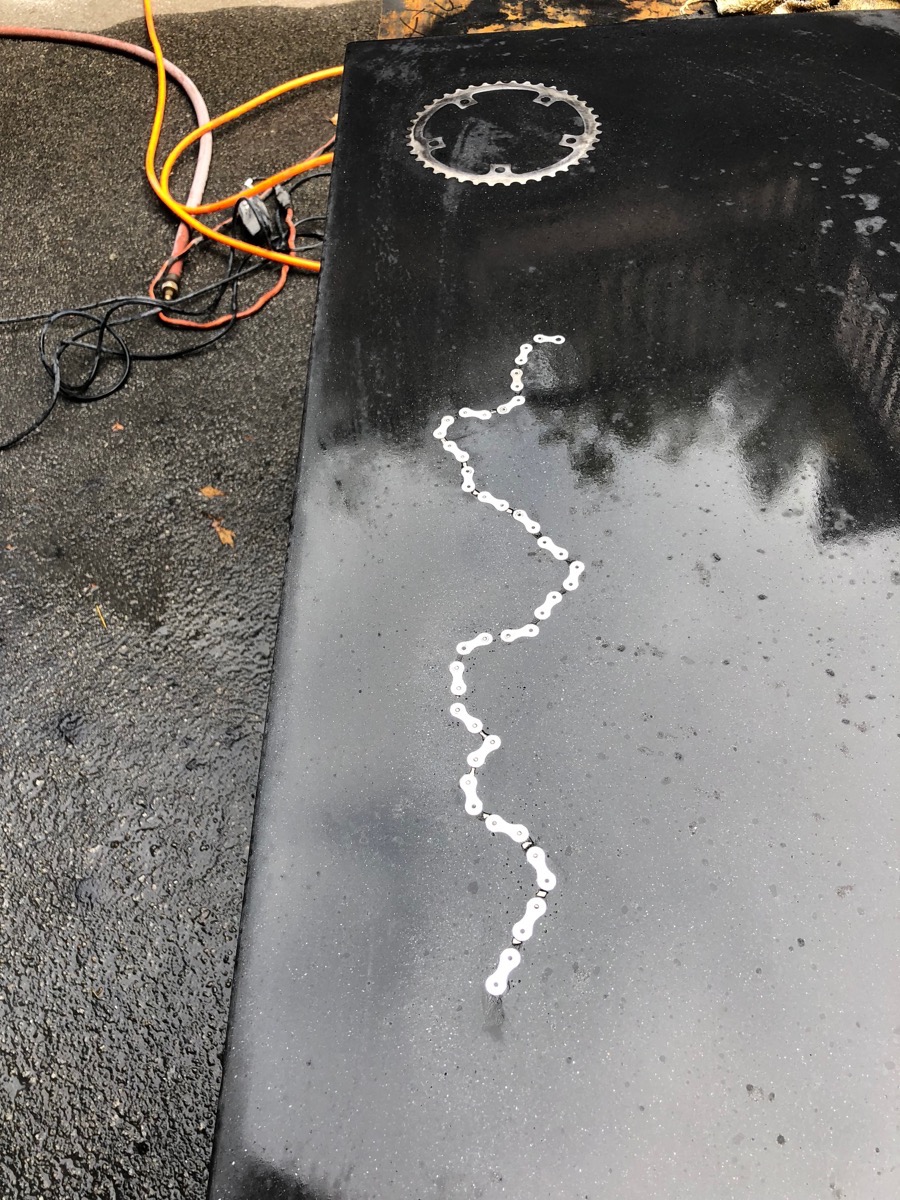
The mold has the edges sealed with black silicon sealant; I wish I would have used a smaller amount and taped lines to keep it straighter. I “glued” a chain and chainring down with some sealant.

The other countertop has some glass accents we got from Cheng’s Concrete Exchange. We drove up to Concord (about 1.5 hours away from me) to pick up the concrete instead of paying to get it shipped. The glass accents were expensive ($40 each), and look like regular melted glass dribbled onto some flat surface and then spray painted gold on the back. I bet I could make these myself (if I had a forge…)

We used white DFRC concrete from Concrete Exchange. It was “Surecrete Xtrme Precast Mix” – http://store.concreteexchange.com/surecrete-xtreme-series-precast-mix – $28.75 per bag, and we used thee bags per side for six total. It requires Surecrete Xtreme Modifier, and whatever pigment you want. We used “Jet Black”. The DFRC is fiber reinforced and doesn’t require a metal rebar form, and can allow you to have a lighter tabletop by not filling in the entire area. I took advantage of this by creating a sub-mold for the inside. The outside “rail” edge is the full 2” thick (by 2” wide — note that I’m going to have ½” of overhang — larger overhangs might want a wider edge for strength). The inside is about ¾” thick. I held the inner mold up by screwing it onto the top of the mold.

We didn’t vibrate the first pour very much and the result was a bit swiss-cheesy. For the second pour I first poured just the ¾” base (about 2 bags, mixing one bag at a time) and pounded all the sides and underneath a ton with the hammer. This technique worked awesome to eliminate all the holes/gaps/pinholes/voids/etc.
I left the concrete in the mold for 6 hours, then removed the side mold pieces, flipped the piece, and removed the bottom mold piece (now on top after flipping).
Below is a picture straight out of the mold; this one didn’t have enough shaking done, and had the swiss-cheese look with lots of voids:

The second turned out almost perfect with no holes. It did have some ghosting from the inner mold, but that later went away with light grinding/polishing. There were a few voids by the glass detail:

Close up of the chain ring; it embedded a little bit deeper than I wanted, but that was okay:

I pulled the tables outside my garage and started grinding/polishing with a granite/concrete wet sander.

I think I ground it up to 400 grit; starting with 80 on the rough one (the geared one) and 100 on the better one (the gold glass one).
I mixed some XS Slurry with another color packet and filled the voids in on the gear table top:

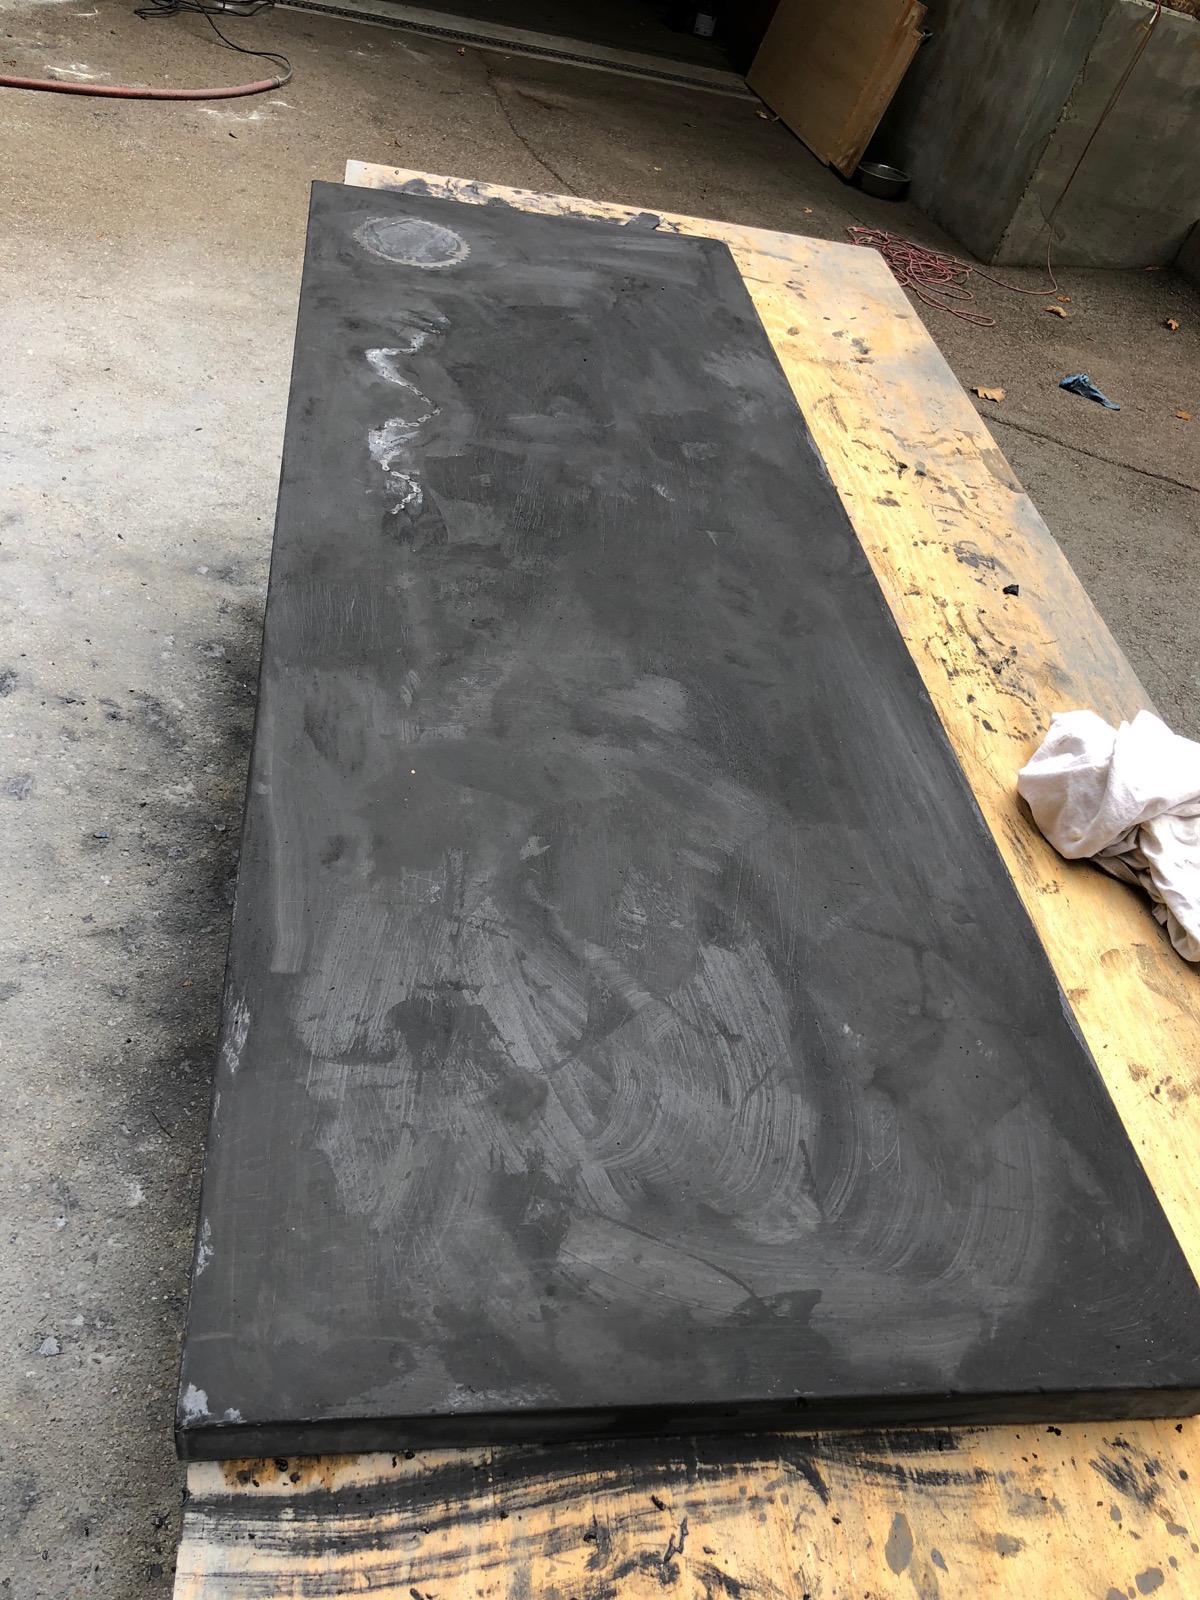
After that, I ground it again up to 400, and slurried it a second time. I then did a final grind/polish only up to 400 because I wanted to put a finish on the table. Before the finish, the table looked nice and black when wet, but really gray when dry. My goal was a deep black:

Dry:

Wet:

Dry:

I pulled them back into my garage and put on two coats of XS 327 sealer from Surecrete based on the directions on the Concrete Exchange’s website. It worked awesome to bring the color back!

Finally, I installed them on the new cabinets I made:


