Plug Bug: Electric Ceramic Heater
I got my heater installed; I can test the fan and make sure the contactor comes on, but heat won’t come out until I actually have my battery pack installed.
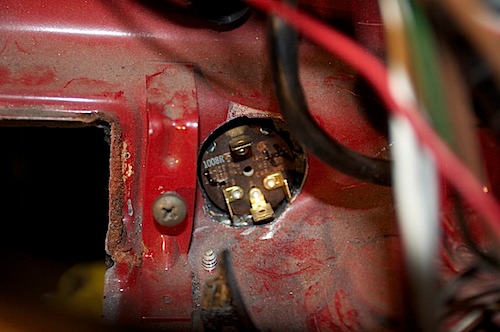
I cut a hole on the dash (opposite the emergency blinker sign, to the left of the ash tray) for the switch. I had to grind down the back area a little bit to make sure the contacts didn’t touch the frame and short anything out.
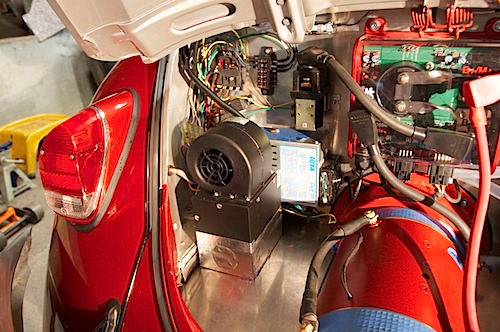
The front 3-speed switch is then mounted to a little face plate that shows off/low/med/high. No picture (I forgot to take one). The fan and box containing the ceramic heater is mounted to the left of the motor. I simply drilled two little holes in the box frame and tapped it with 1/4-20 threads so I could just screw it on from underneath. The box has two outlets; one going towards the front of the car and one to the back. There is a hole for the heater hose under the DC-DC converter and it runs directly into the existing heater vent hose for the car’s vent system. The other side I covered up with foil tape; I’m not sure the heater will put out enough heat to power both sides of the car, so I’m going to try it with one side first. If I decide to do both sides, I’ll uncover the hole and drill another hole directly in front of it to run the tubing through and over to the other side.
The contactor will power the ceramic heater core. For safety reasons, I want it to turn on automatically with the fan. The trouble is, I have three fan speeds and I needed to somehow tap the power to a single 12 volt lead to turn on the contactor. I tried to figure this out myself, and I thought “man, this would work if there was some way to limit current flow in only one direction…”. I emailed Randy from CanEV.com (where I bought the heater kit) and asked. He said to use some diodes, and a quick google search later I realized those were effectively electricity check valves. It makes me wish I would have taken at least one EE class in college!
I still wasn’t sure what kind of diode to get and what size, and how exactly I should wire them. So, I asked on DIYElectricCar.com. Apparently you can just put them inline, and Sam on the forums also said to use an extra diode on the back ground side to snub off extra voltage. I’m glad I asked, since I didn’t know that was recommended practice, and now I wonder if I need to do it for my other contactors (although, they have some little diode thing on them already).
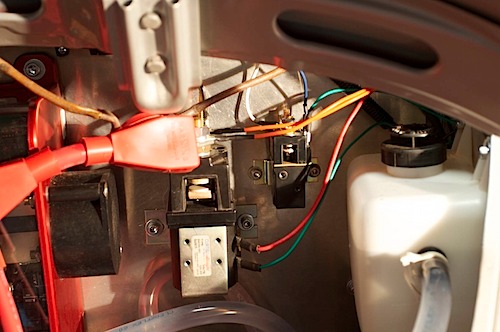
I split my three input wires and used 3 diodes to merge them into one wire to power the contactor. The contactor is a little guy on the right of the right hand (positive) contactor. It is close so I can wire up the positive side of the pack to it.
In between the contactor and the heater core is another HV fuse (important!).
The fan works great and flipping on any three speed correctly turns on the contactor. Sweet!
The car is effectively all wired up, and I only need batteries. I do need to some weather sealing on the rear to let me be able to drive when it is raining out.


