First Machining Project: Vise Stop
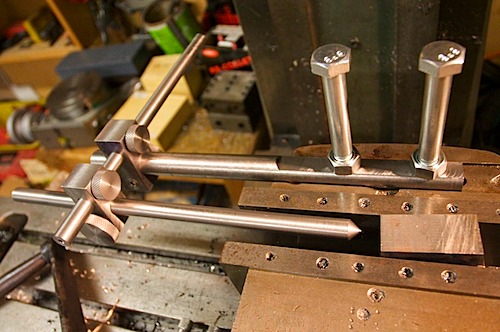
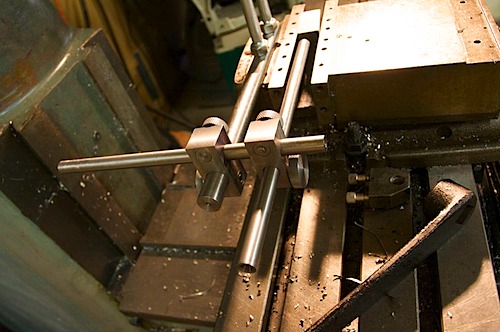
Every machinist needs a good vise stop. Here is mine, 100% completely made from raw steel, except for the bolts bolting it to the vise (which are too long — I need to buy new ones):
The knurled wheels use split collars to tighten the bolts down. The larger knurled ones work much better than the smaller ones (require less force to tighten the things down), and I may make some more larger ones.
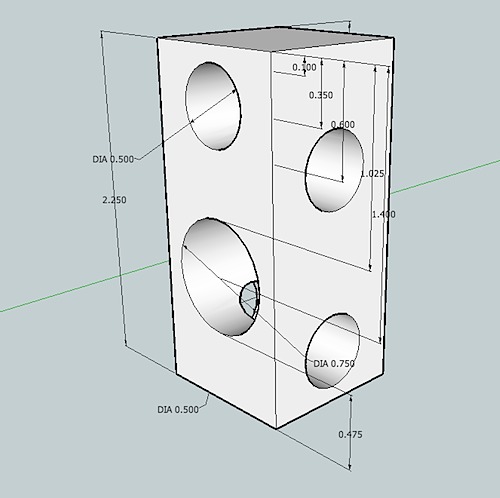
So, how did this project come to finally being finished? I searched the net and found some great links on things people had done. I initially found A Vise Stop for the Kurt Vise on “CNC Cookbook” (excellent website!), which is based off of a post from CNC Zone. I decided to use the basic designs, but modify it slightly to avoid turning too many different sized rods, using the stock I had at hand, and also making it work for my Bridgeport vise. The Bridgeport vise has no tapped holes on the back, so I had to use some tapped holes on the top instead. I started up Sketchup and did some “quick” drawings. Feel free to download the file: Vise Stop and modify it, but here is a short picture of one of the two stops (they are different sizes):
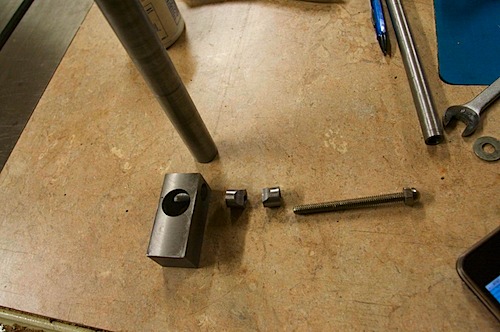
I made split collars similar to how the guy on CNC Zone makes them, except I didn’t see a need to machine a small lip on them. Instead, I machined them to exact diameter and length, and then tapped it all the way through with 1/4-20 threads. I used a 1/4-20 brass thread that has nuts (and washers) on both sides. This held the split collar tight while I machined the half moon circle on it:
After I machined the circle in the collar, I split it by using the parting tool on the lathe and then drilled out one side’s threads (otherwise, it wouldn’t clamp tight!).
Overall, most the operations were simple, but it all taught me a lot: squaring up stock, machining it to size, drilling accurate holes, tapping, threading (with a die), knurling and turning between centers with a lathe dog.
Overall a great first “real” project (I have made other stuff, but mostly small things that I needed for other projects).



Glad to see your writeup, Corbin. Have you considered learning solidworks? It’s like sketchup, except 10x as powerful. Yes, I know you’d have to reboot into windows for it, but I think that its worth it. Solidworks is much, much more powerful than sketchup, and also, hardly anyone uses sketchup for machine design. I have a number of projects drawn in solidworks which i can also send you, if you want.
For the split collars, I think I would have done them slightly differently, so as to avoid having to do an interrupted parting cut in the lathe. Rather than putting the cylindrical cutout in and then parting off, I would do the following:
1. Turn to size, drill, tap, etc. Make blank be overseize in length by the same amount as the kerf of the partoff tool.
2. Part off.
3. Make a washer from anything (steel is cheapest, brass machines the best) that is the same thickness as your partoff tool. Clamp it between the two halfs of the nut.
4. Place nut in the bore where it will be used, and use 1/2″ endmill (you can step with a 3/8″ EM if you want) to plunge out the hemisphere.
5. Remove the shim, and you are done.
This way no interrupted cuts anywhere. Ideally the cylindrical cutout would happen in the same pass as the hole, but things don’t always work that way.
I think homeshopmachinist.com or practicalmachinist.com would both be good references for you (better than cnczone, IMO). Practicalmachinist is a bit more professionally oriented, but the machinists are very, very skilled, and hey have lots of interesting ideas, projects, and help (if i feel like reading a machining site, it’s PM). The south bend forum is also very much aimed at guys like us who are just working from our garages (although the machinists who post on there aren’t as skilled).
cool, thanks for the tips bev!